Uploading TTS Creations To The Steam Work Shop

In this tutorial, I’ll be explaining how to upload a game to the Steam Workshop in Tabletop Simulator. When working on a custom project in Tabletop Simulator, it is common to save it as a local project until you feel that it is complete. As long as the project is saved locally, you are the only one that can view it. Eventually, though, you may want others on the internet to be able to find and subscribe to your mod. To do this, you will need to upload it to the Steam Workshop.
You can find the full video below, otherwise, keep scrolling for the text version!
Uploading to the Steam Workshop
Suppose you have a project that is ready to be uploaded to the Steam Workshop. Begin by selecting Modding -> Workshop Upload from the top menu.
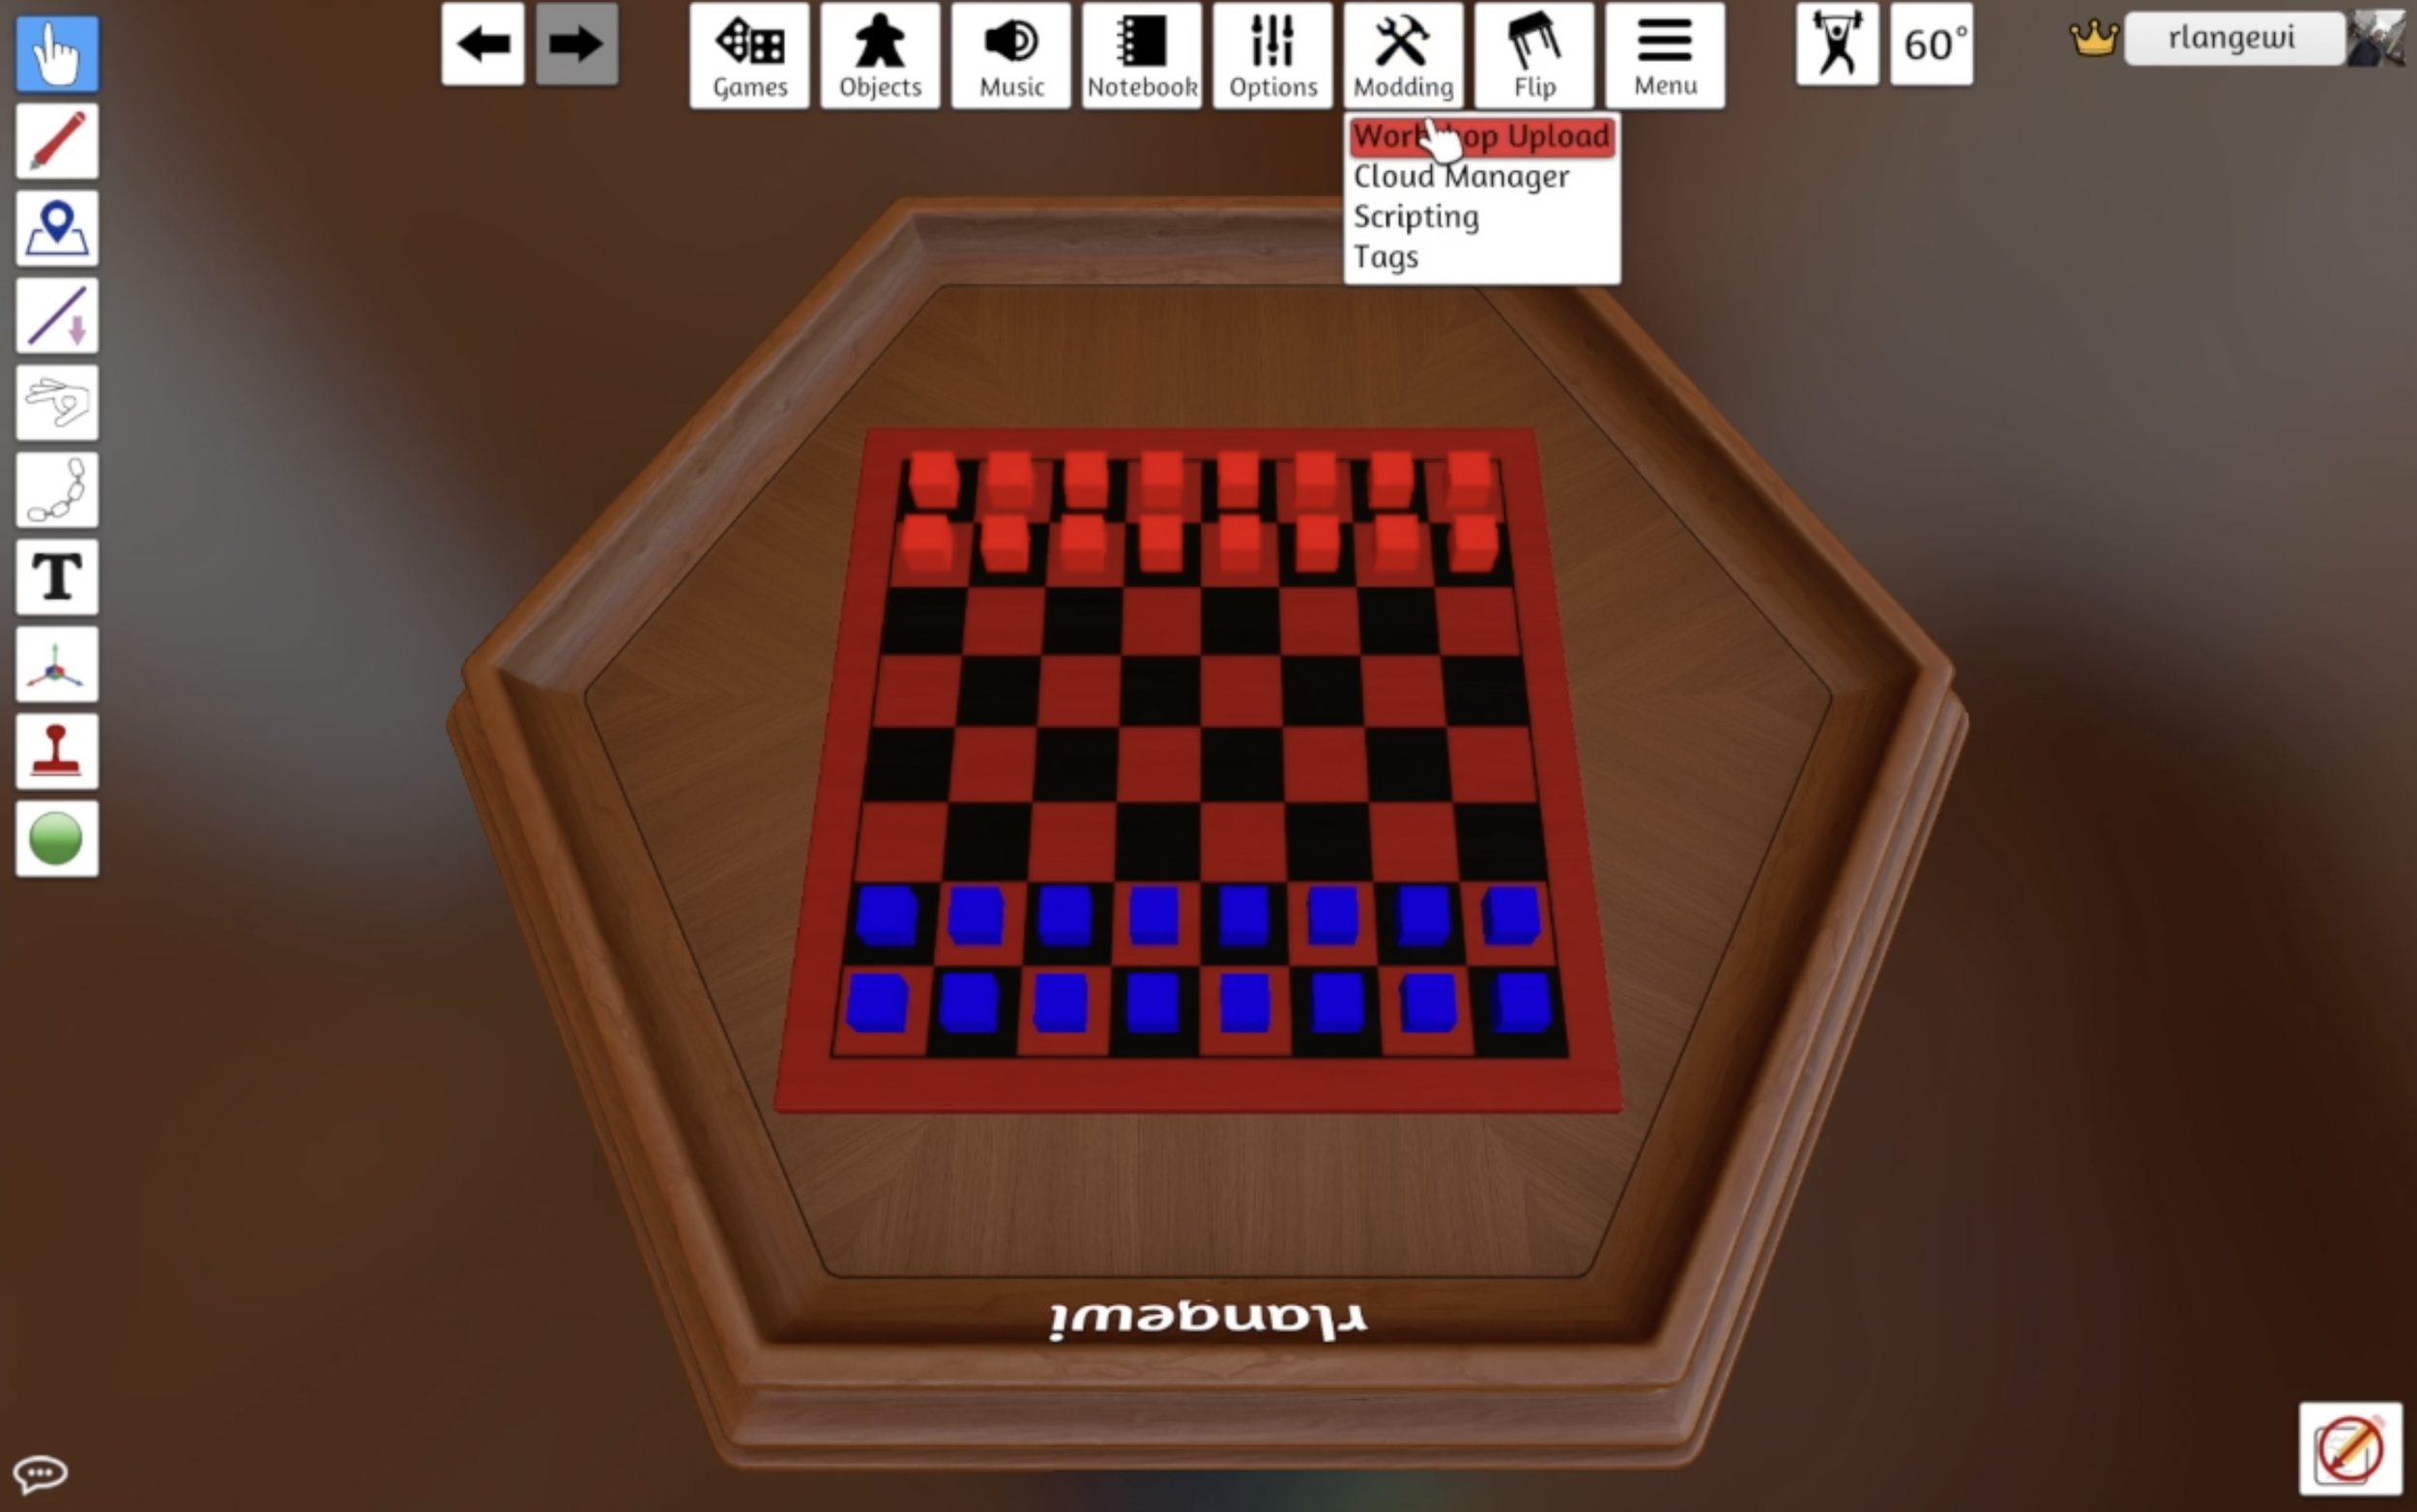
This will open the Workshop Upload dialog. There are two tabs:
Upload Workshop - Used to upload a brand new workshop item.
Update Workshop - Used to update an existing workshop item.
We will begin with the Upload Workshop tab to upload a new mod. The form allows you to edit some basic information for the Workshop item, such as the title, description, and thumbnail. When uploading a thumbnail image, you may either use the button to select an image from your computer or provide a URL to an image that is hosted externally.

The last option allows you to add tags that will make it easier for players to find your mod in the Steam Workshop. Clicking the Options -> Info button will open a form with various tagging options.

These options include:
Name - The name of your mod.
Type - The classification for your Workshop item, allowing you to distinguish between mods that are games, objects to be used in other mods, maps for other games, utilities to be used in other mods, or mods that fall more generically under a “Modding” type.
Complexity - A rating of the complexity of your game/mod.
Playing Time - The minimum and maximum playing time for your mod, in minutes.
Number of Players - The minimum and maximum number of players that can play your mod.
Workshop Tags - Clicking “Edit” will open a form with additional tags that can be added to your mod, where relevant.
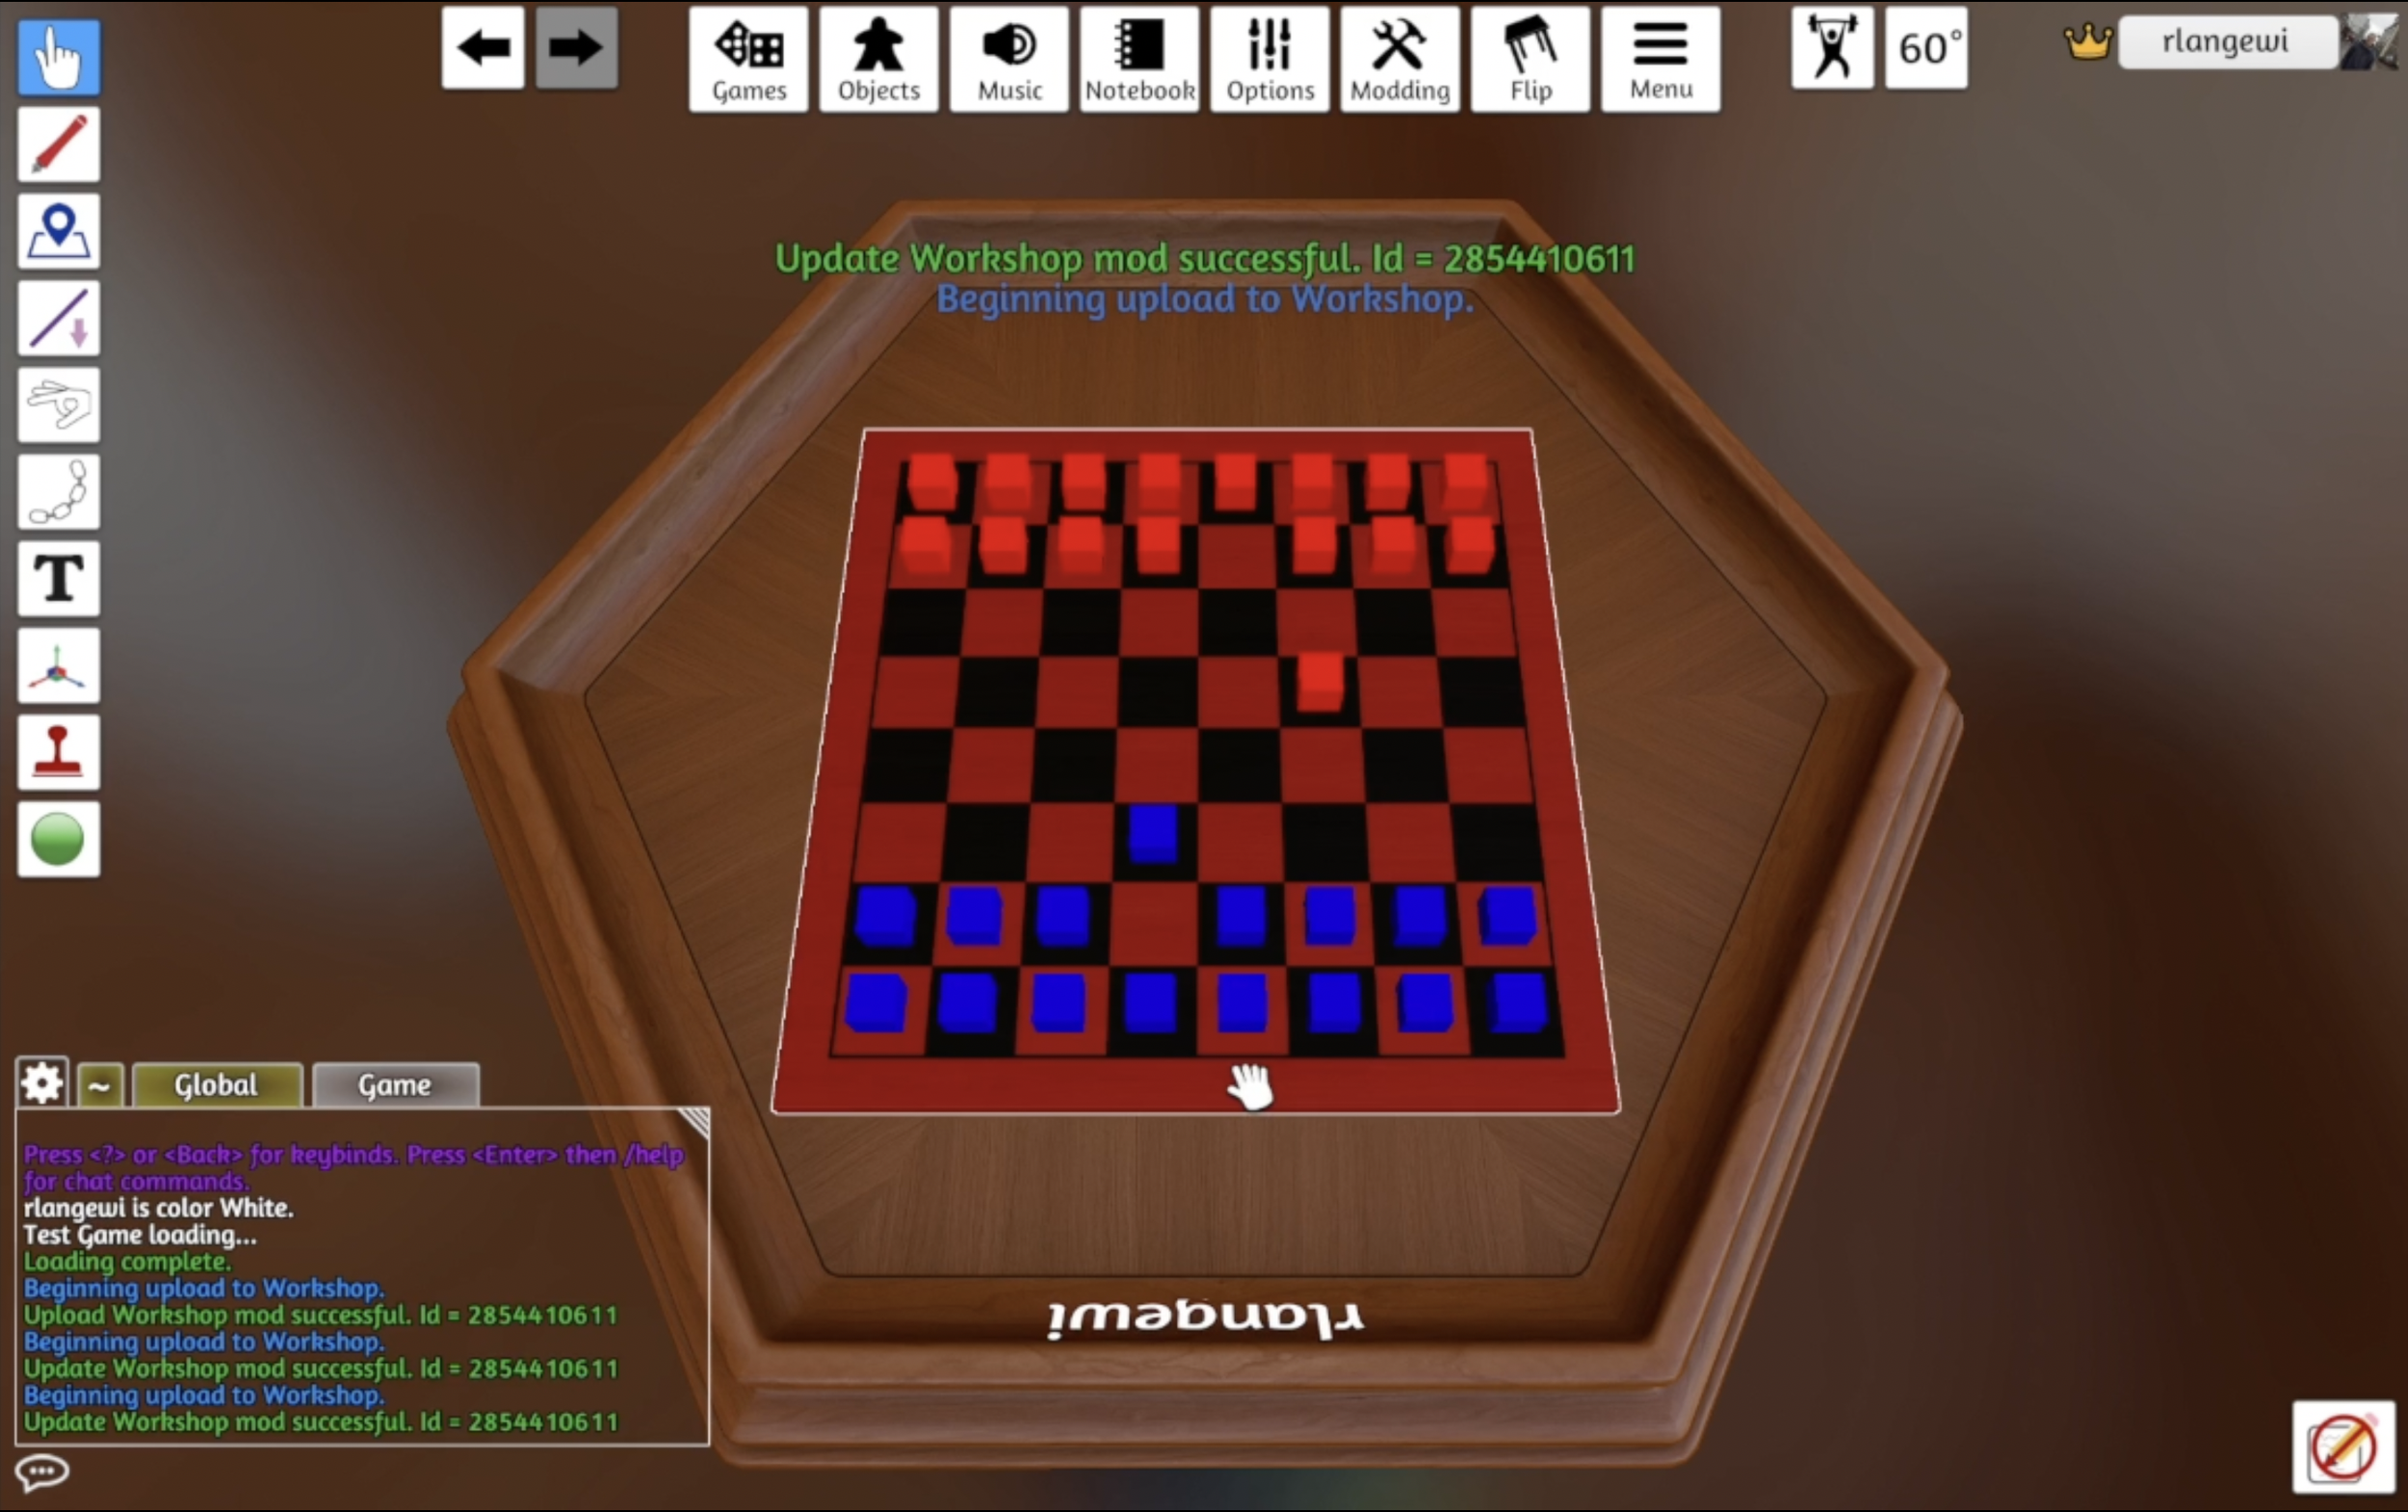
Once you are satisfied with all of the configuration details, you can click the Upload button to begin the upload to the Steam Workshop. After a few seconds, you should see a success message.
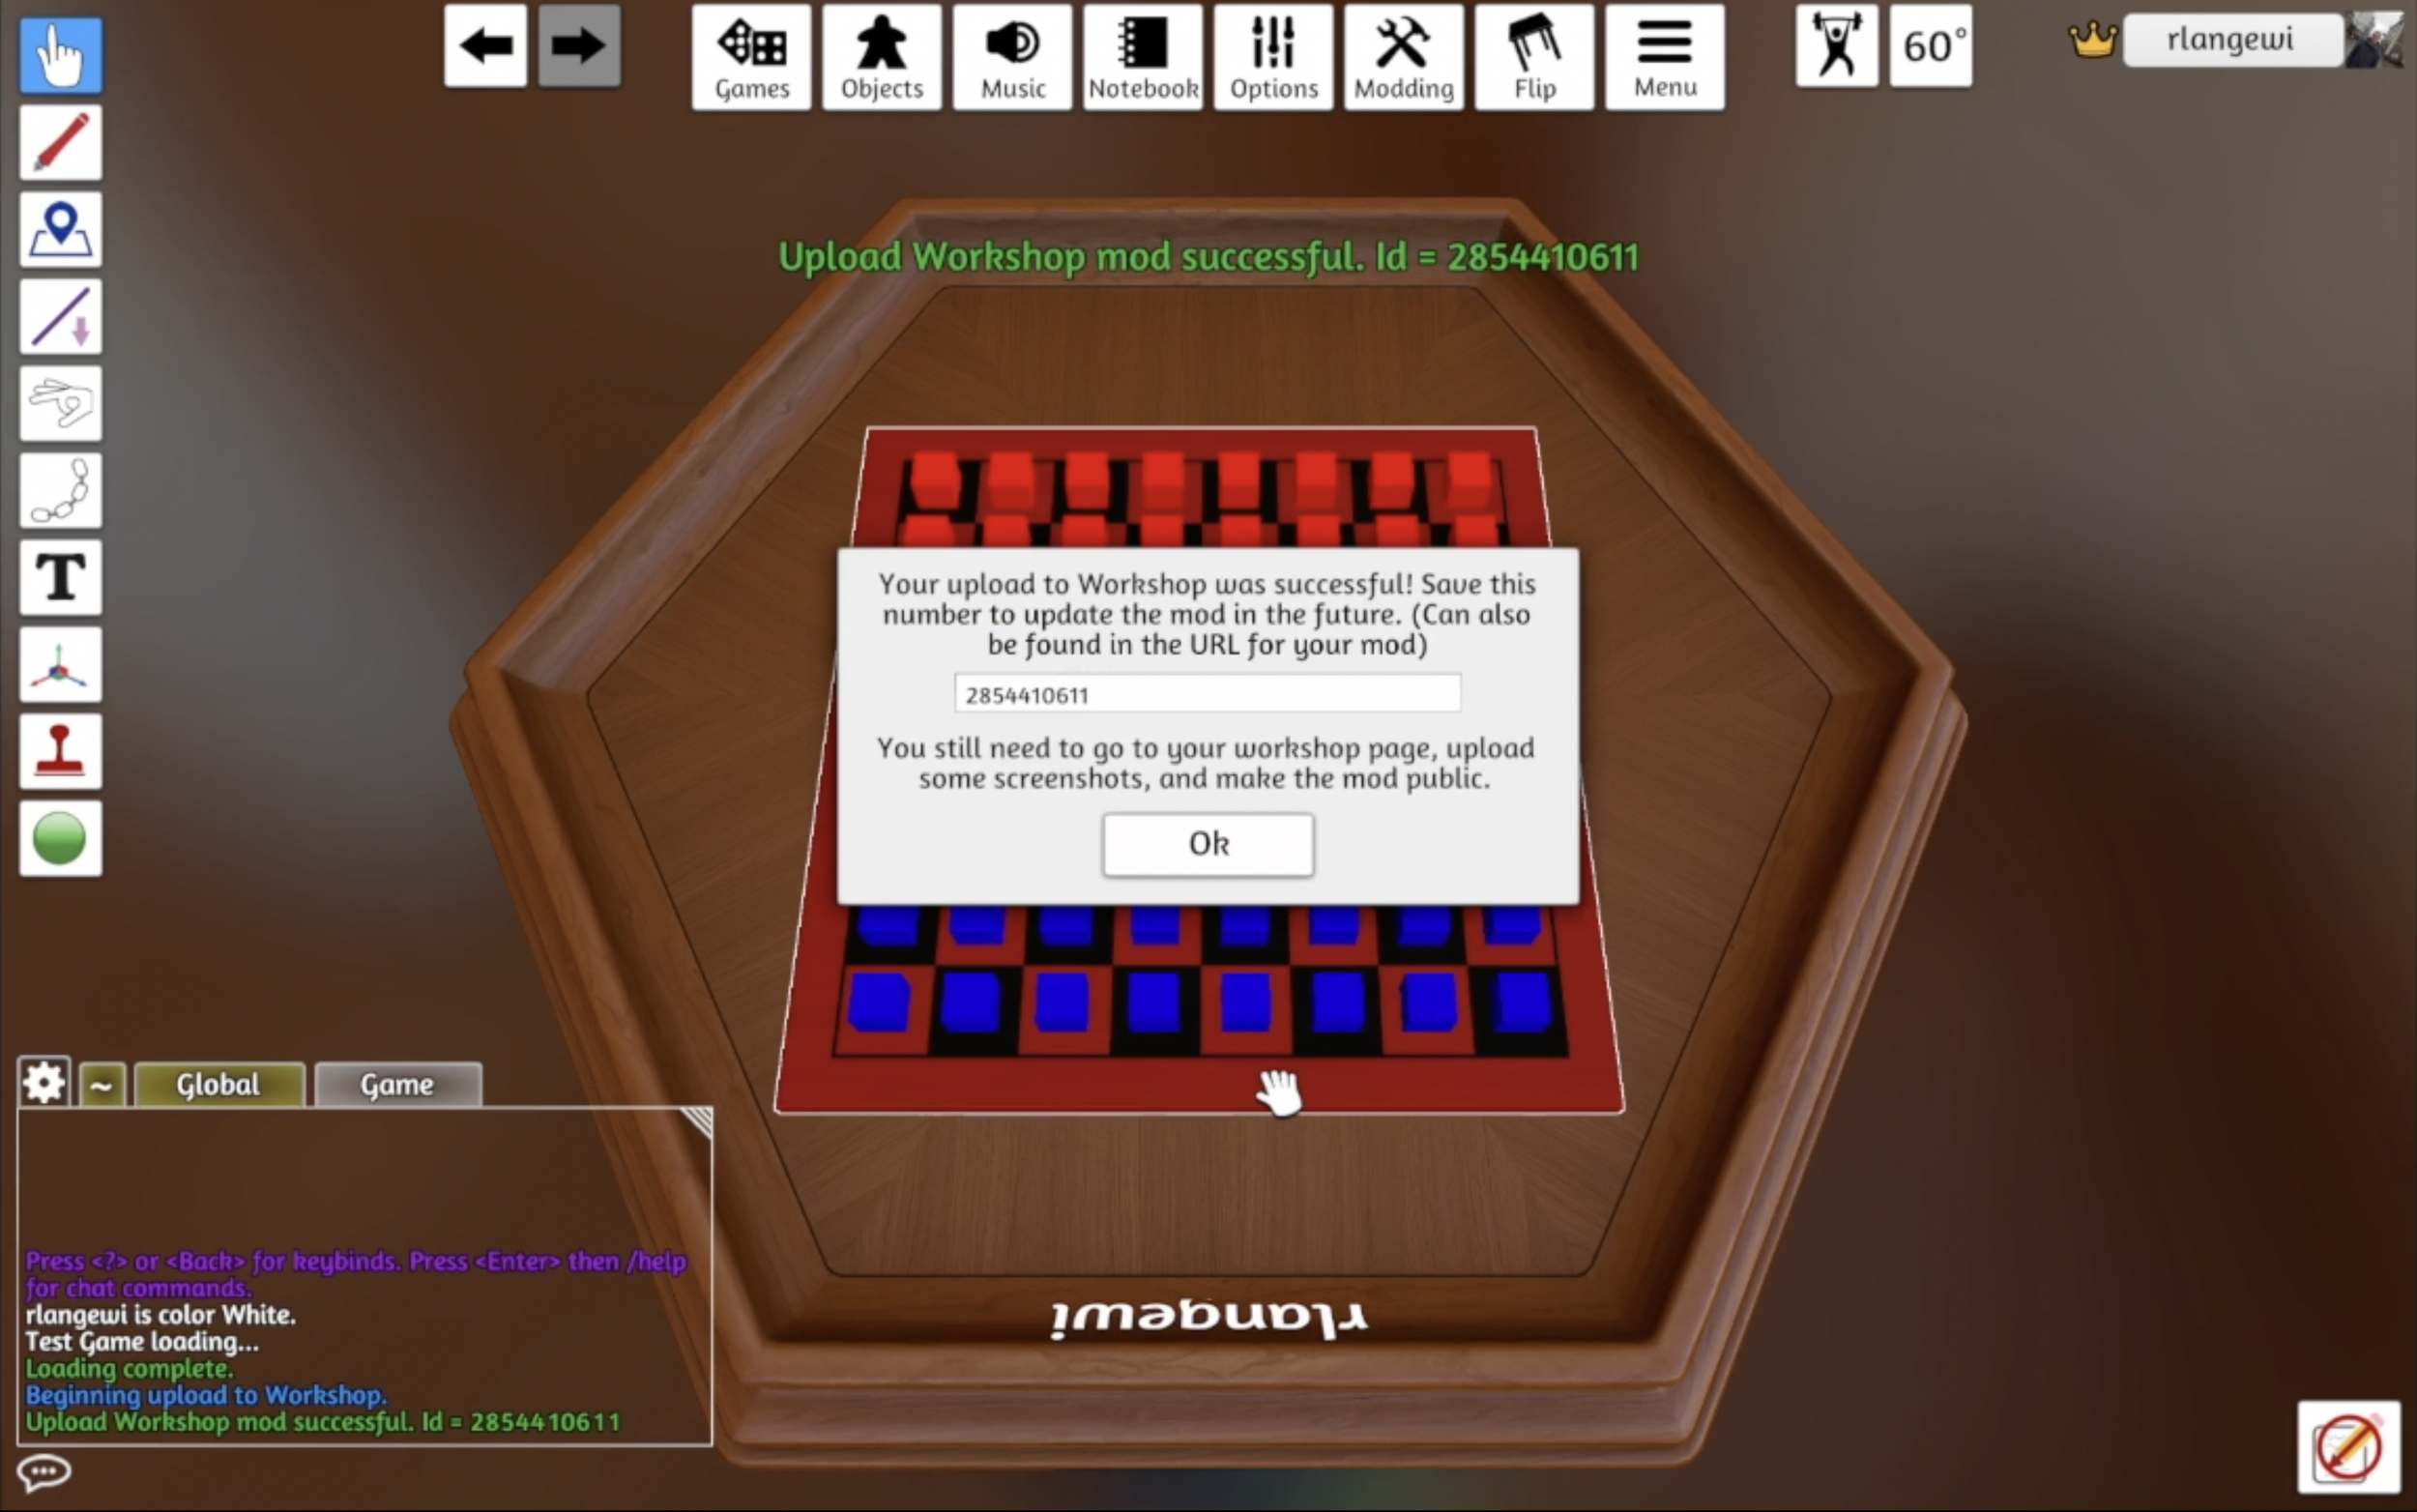
The successful upload dialog will also include a number that serves as the unique identifier for your workshop item. You will need this ID if you want to push any updates to your mod in the future. However, it is not crucial that you remember this ID, as you will always be able to access it via the public URL for your Workshop item (as will be demonstrated later in this tutorial).
At this point, your mod has been pushed to the Steam Workshop, but it is not yet publicly available. So, let’s take a look at the Workshop item in our browser.
Viewing Your Mod in the Steam Workshop
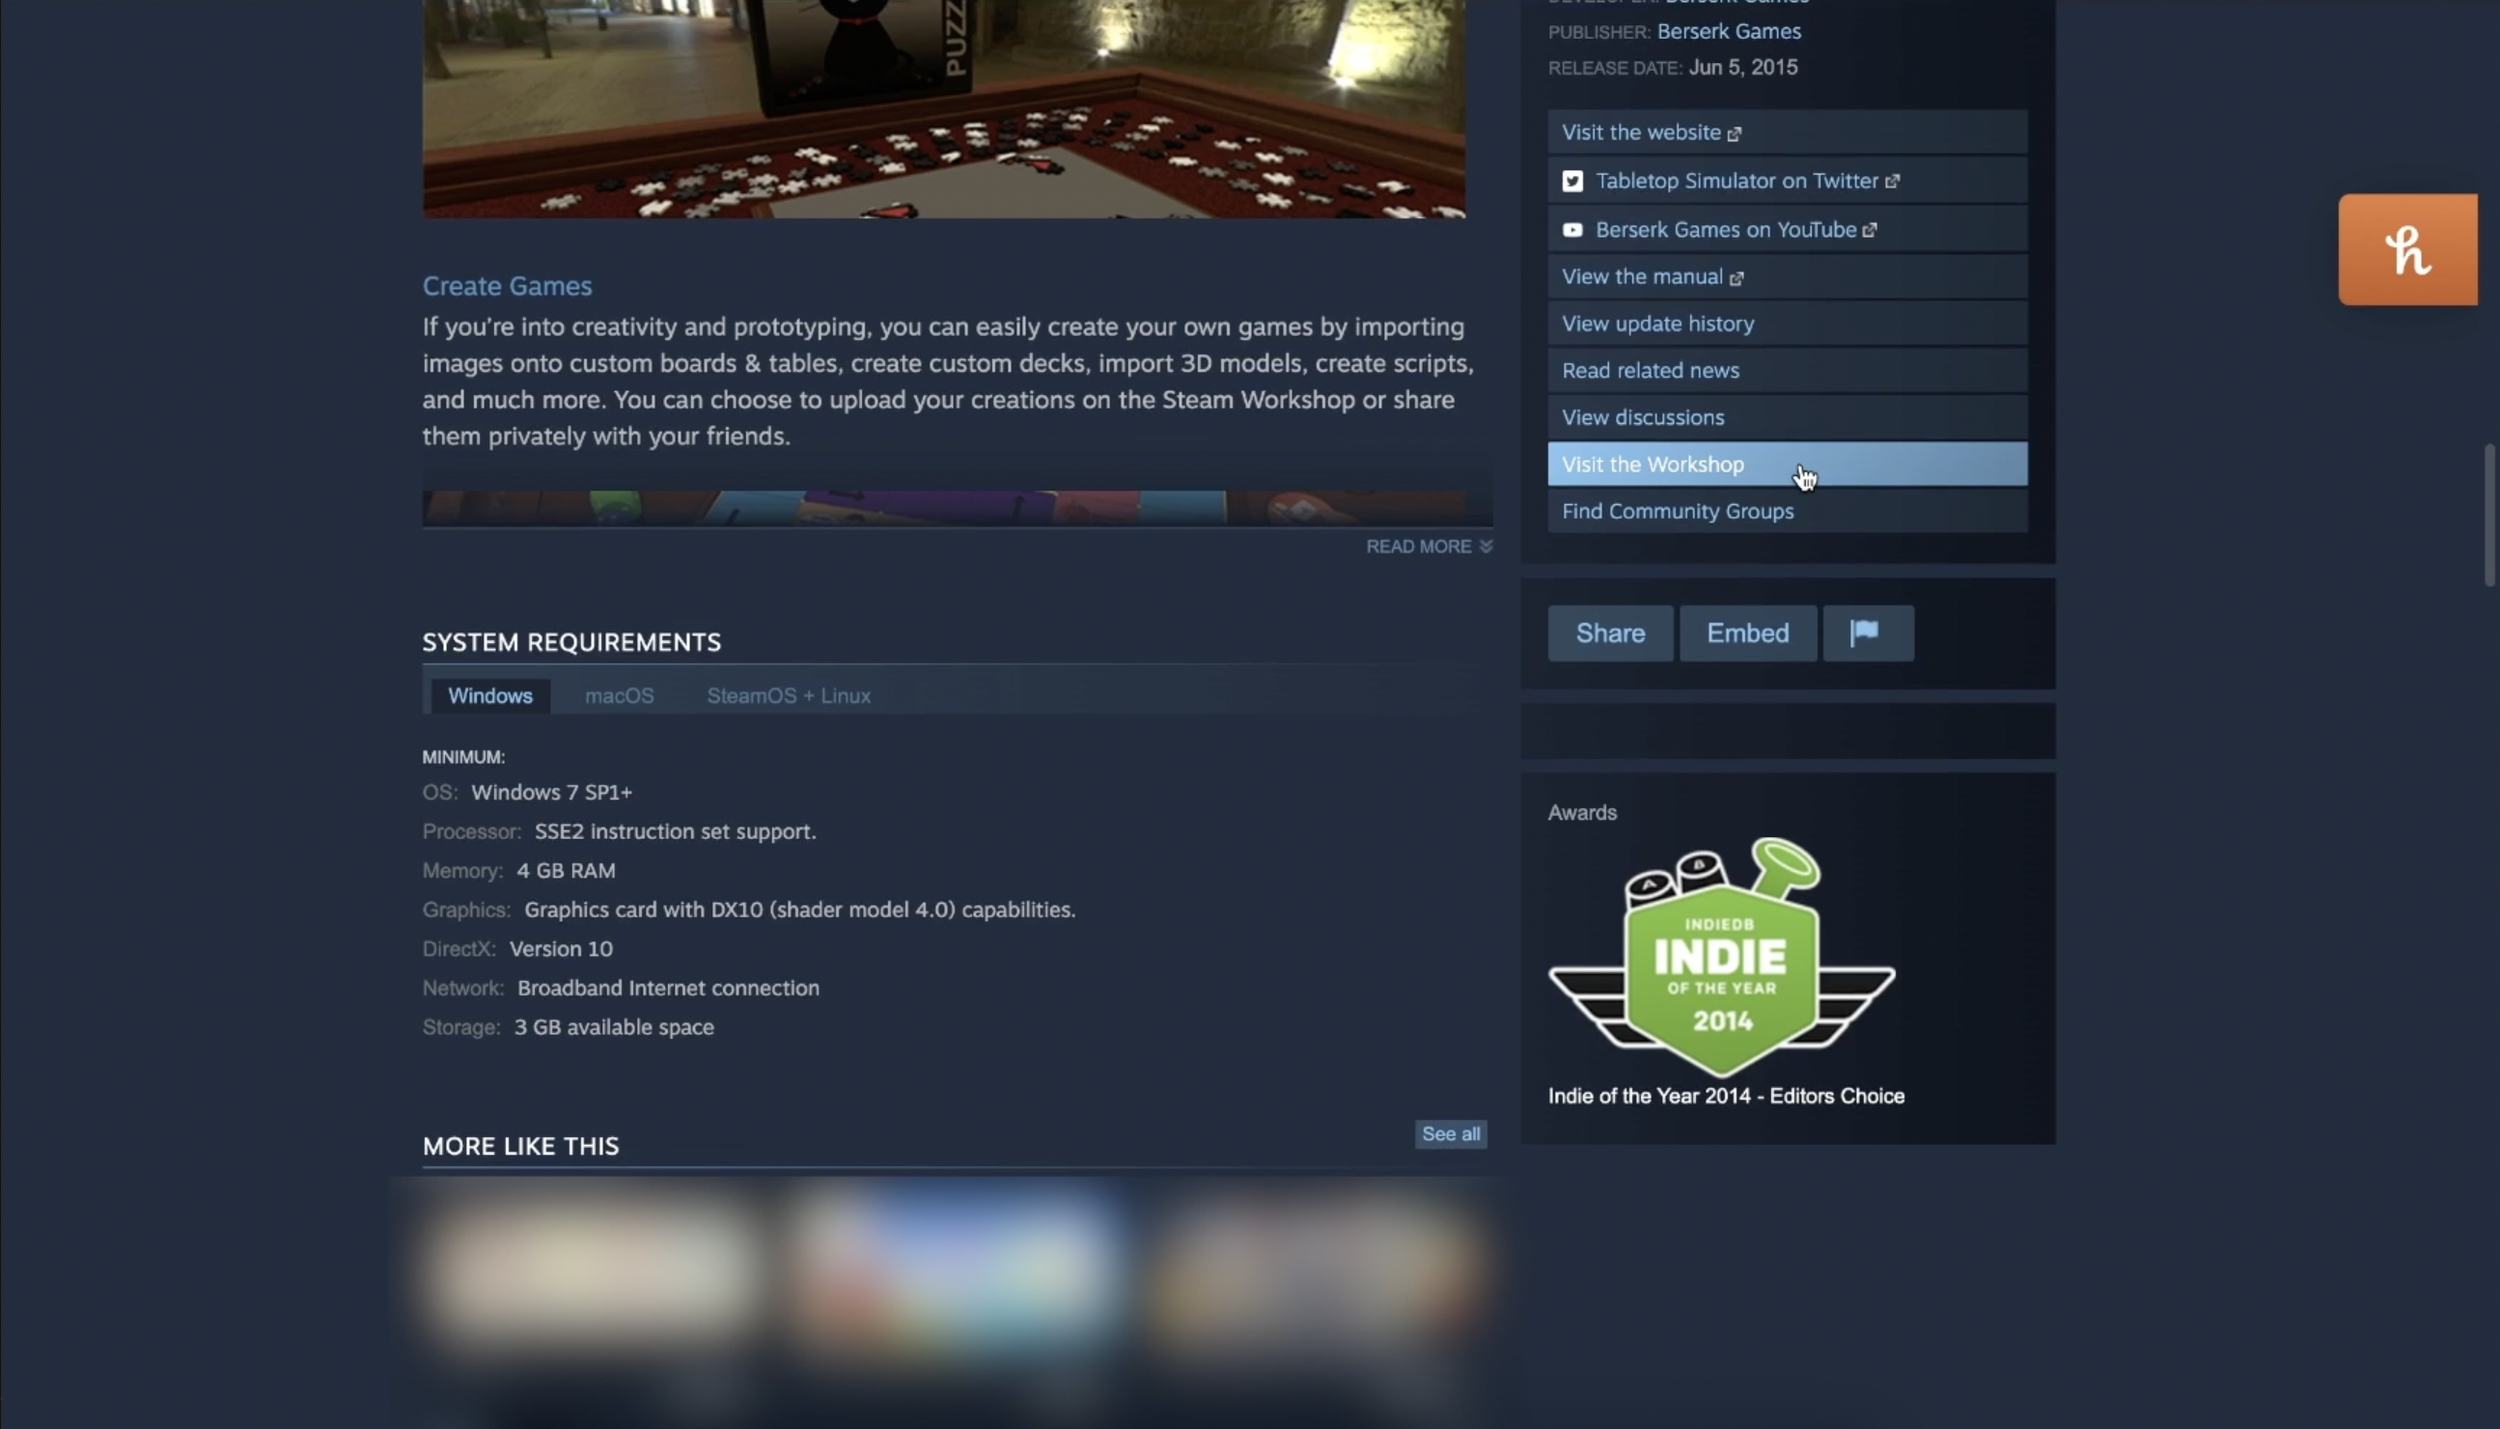
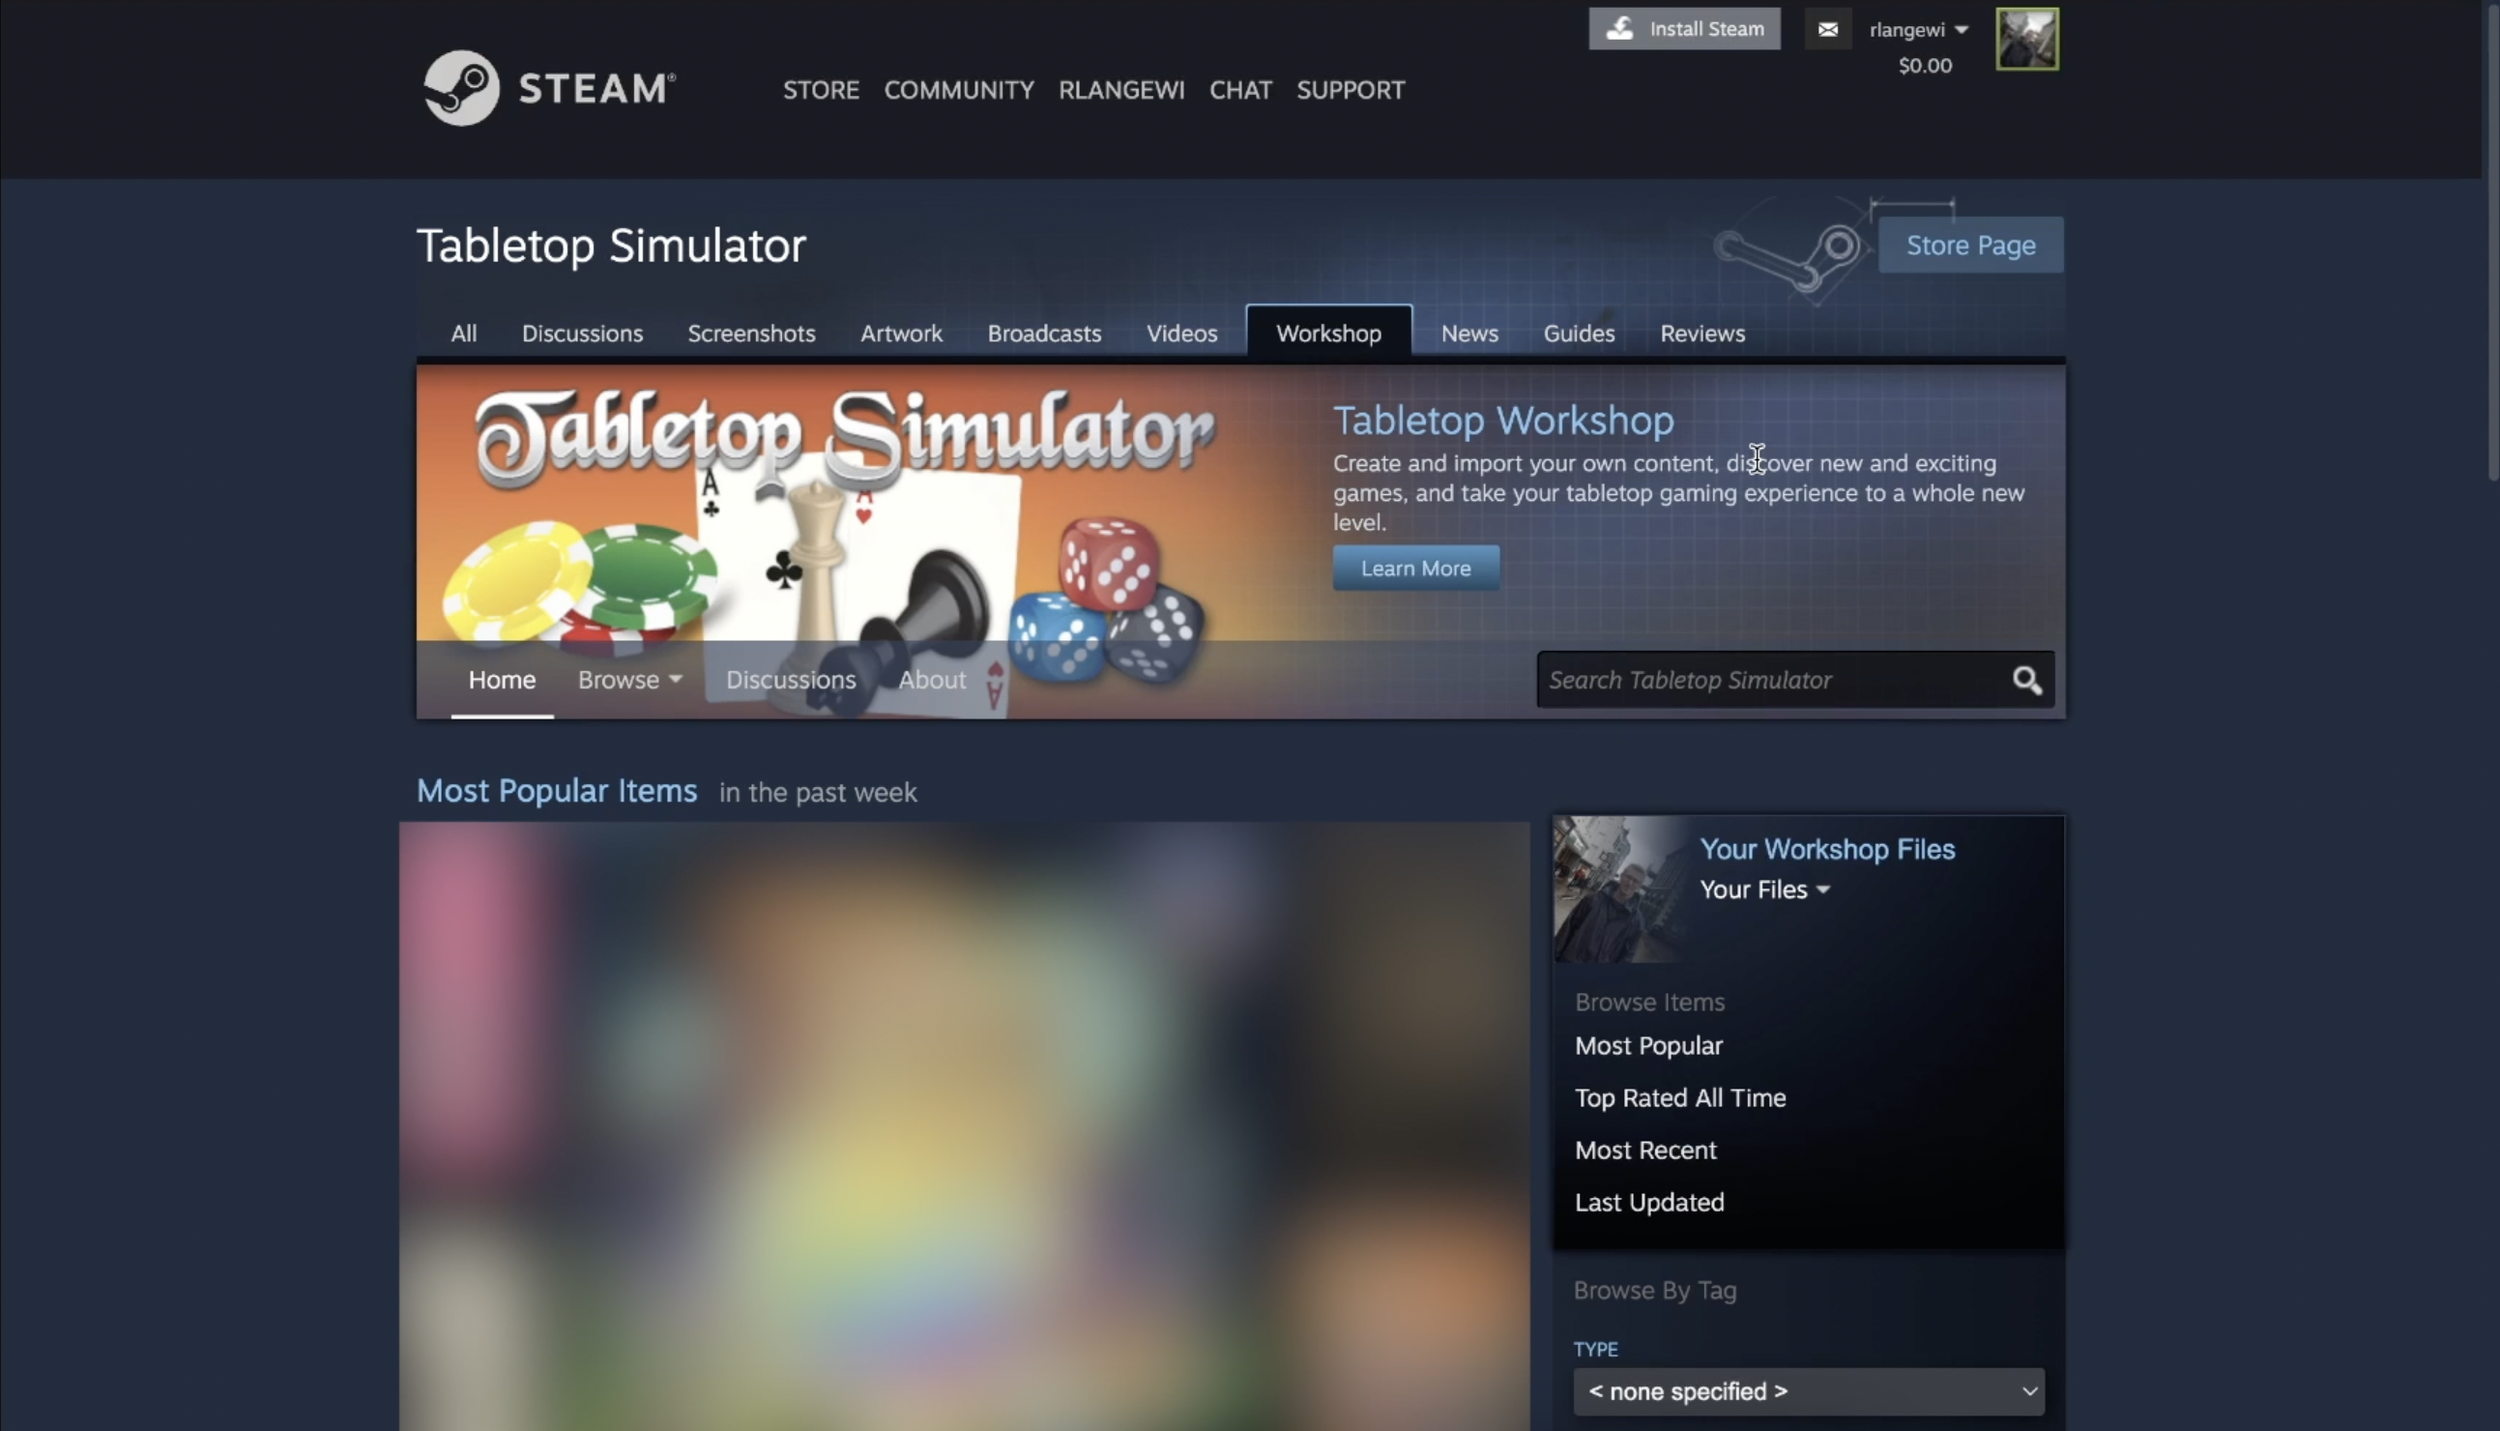
If you intend to upload your own mods to the Steam Workshop, it may be useful to bookmark the URL for the Tabletop Simulator Workshop Homepage. You can also find this link from the Steam store page for Tabletop Simulator by scrolling down to the “Visit the Workshop” menu option.
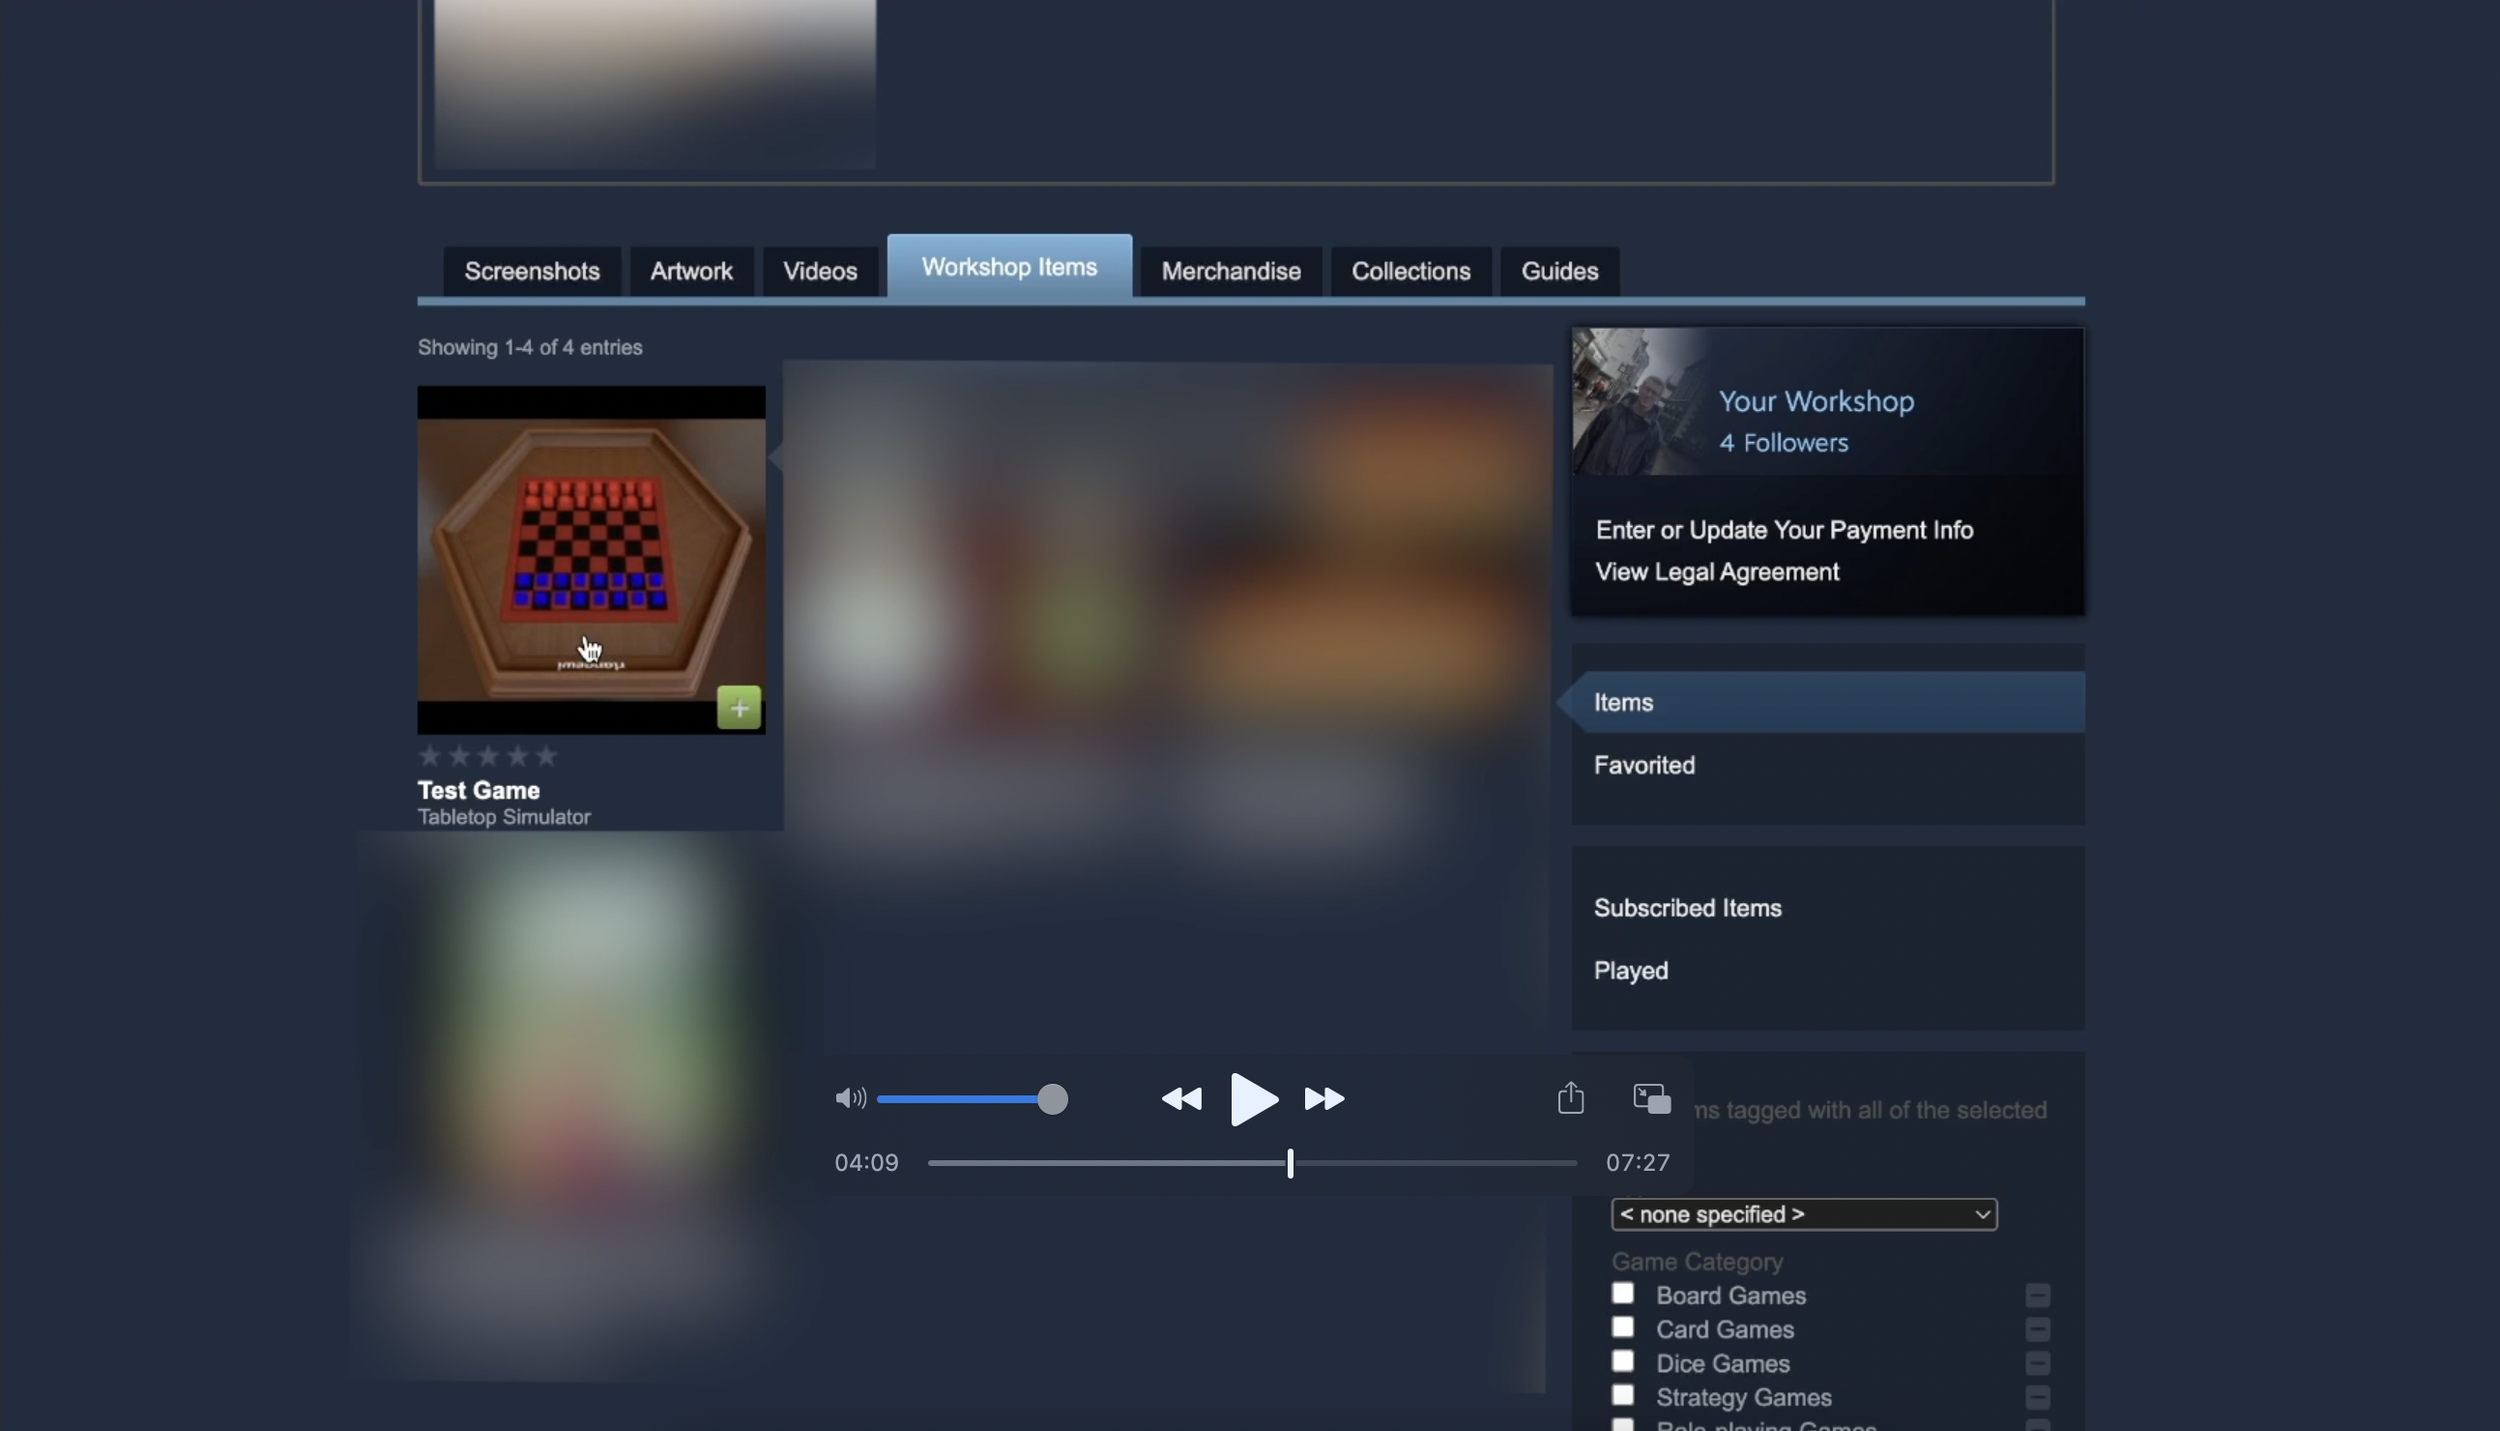
Once you have navigated to the Steam Workshop homepage for Tabletop Simulator, you can view your own uploaded mods by clicking the “Your Workshop Files” link.
Viewing our Workshop Files, we can see that the “Test Game” that we uploaded from Tabletop Simulator is the most recent item listed. We can click this to view the details for our new Workshop item.
After clicking into the “Test Game” Workshop item, we can see a preview of the store page for our mod. However, you will notice a banner notification that specifies that the current visibility is “Hidden.” Currently, you are the only one that can view your Workshop item and it will not show up when other players search in the Steam Workshop. This gives you an opportunity to finalize details before pushing your mod live to the Workshop.
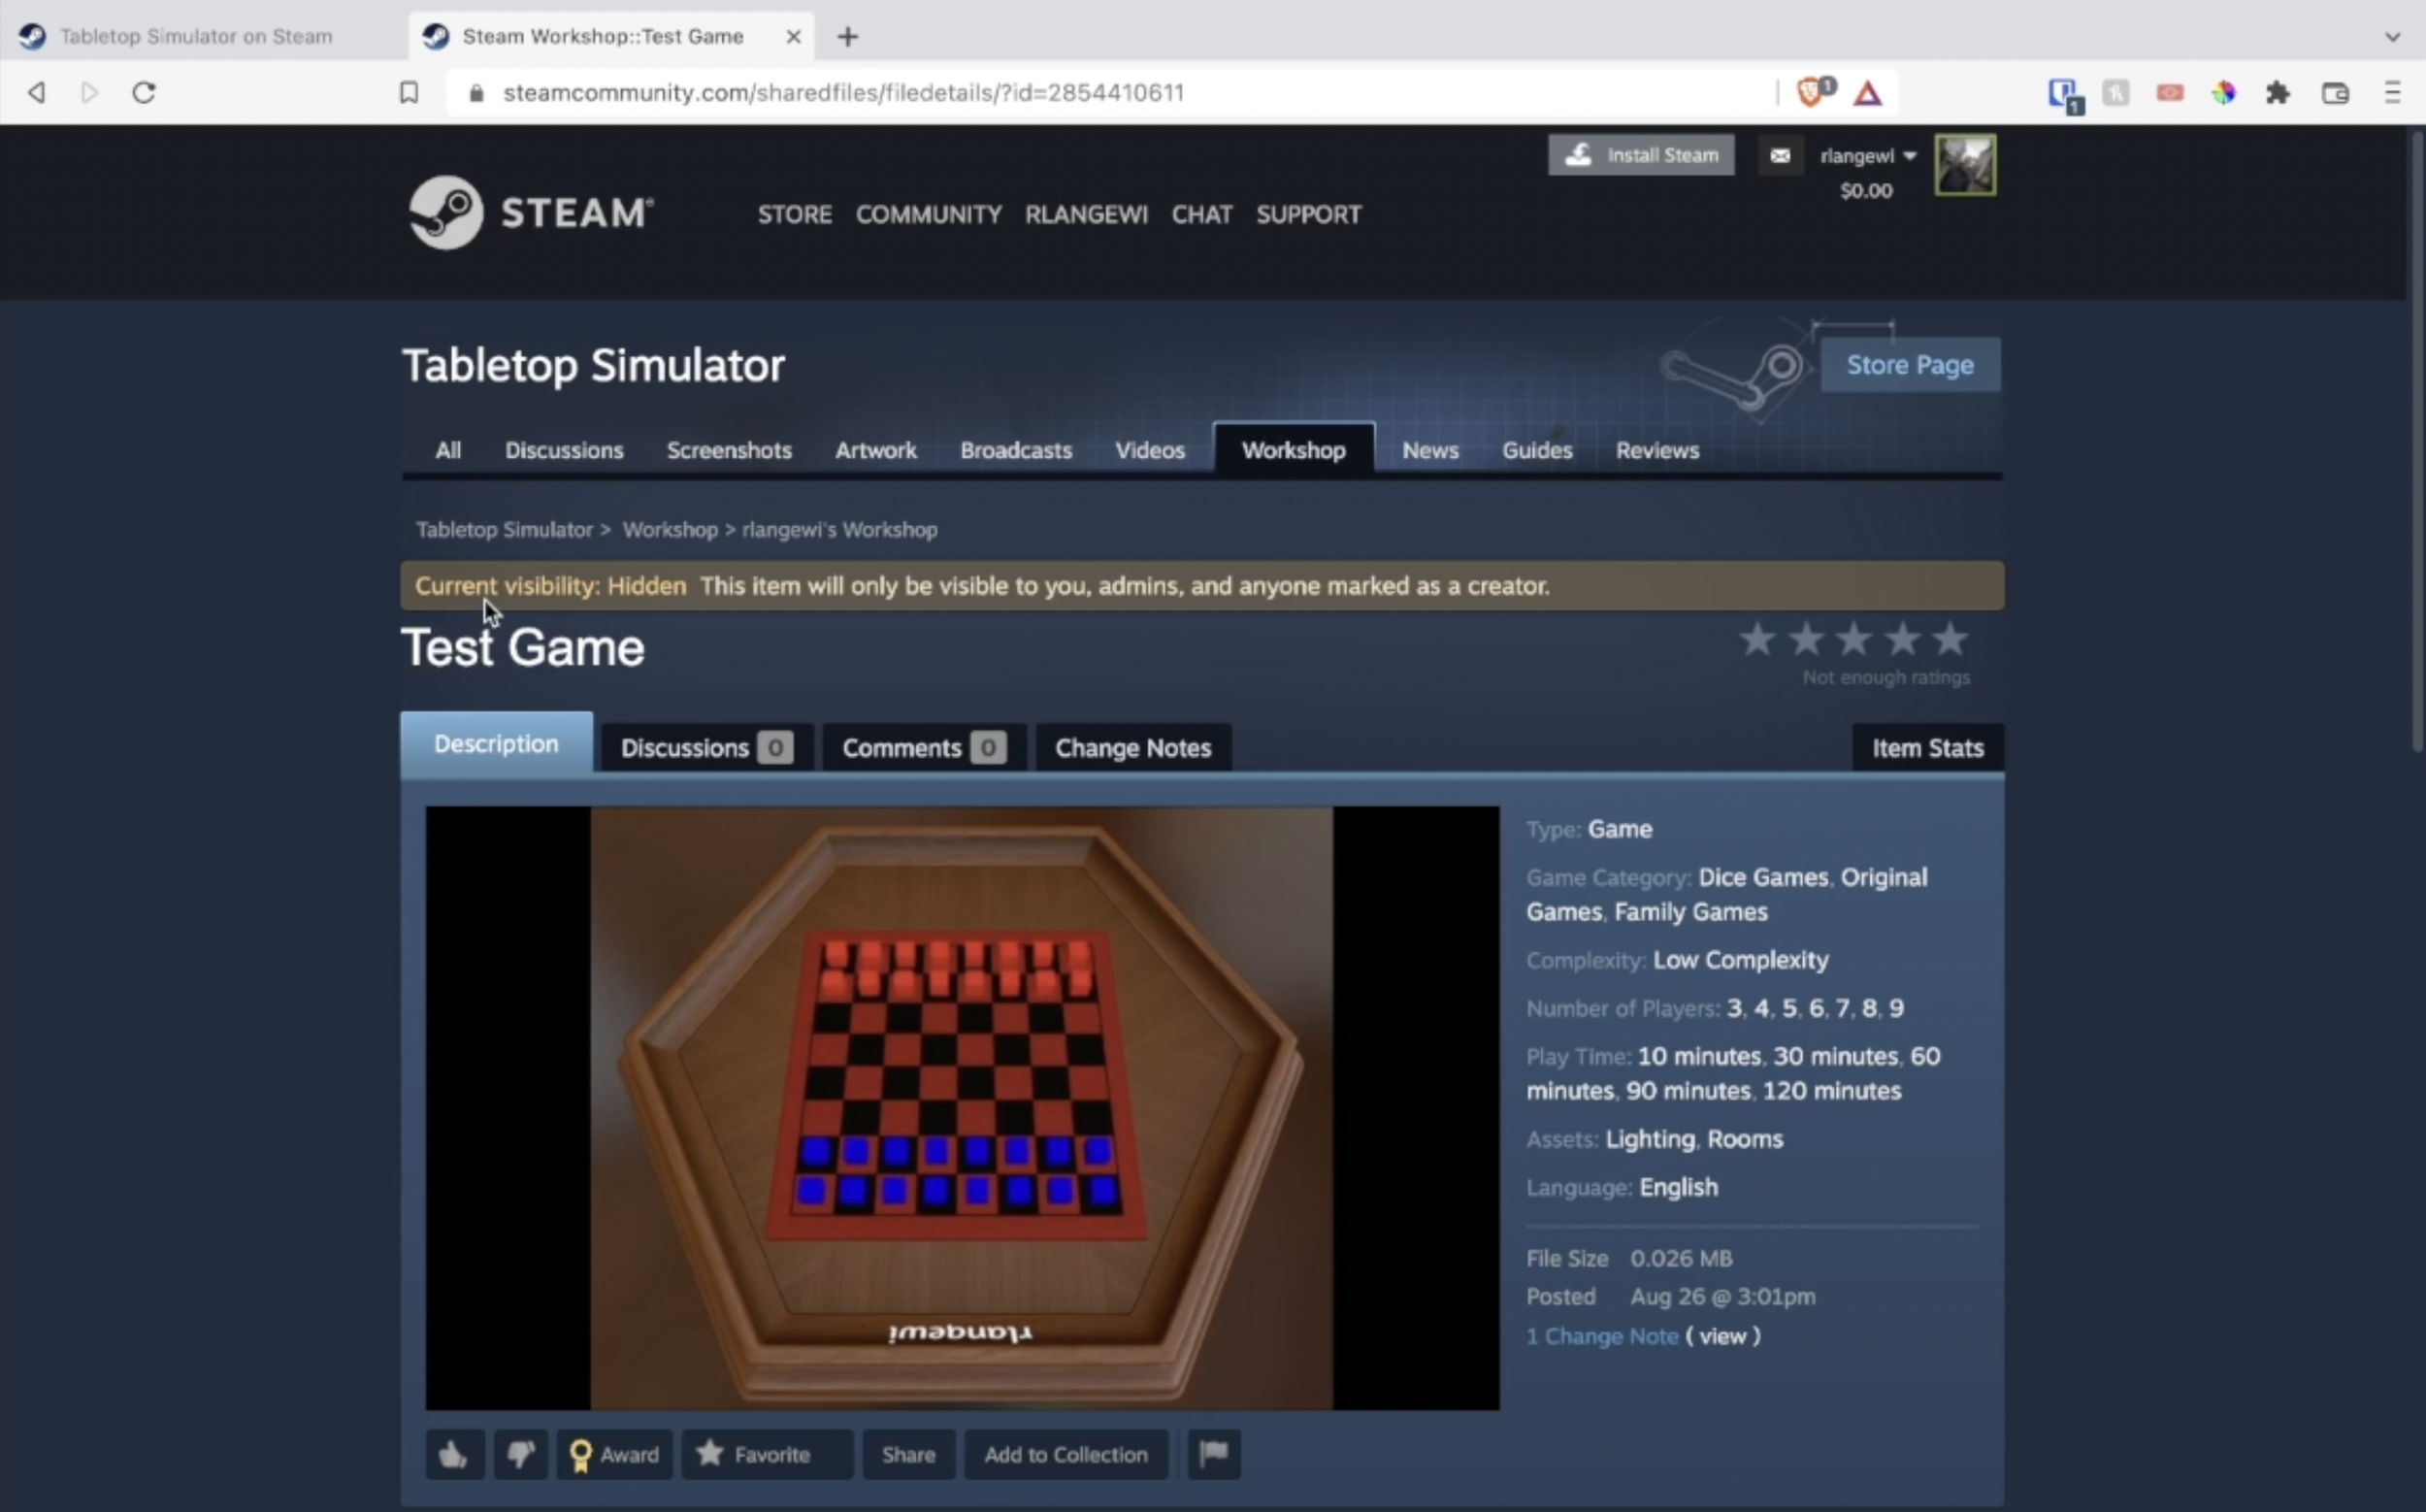
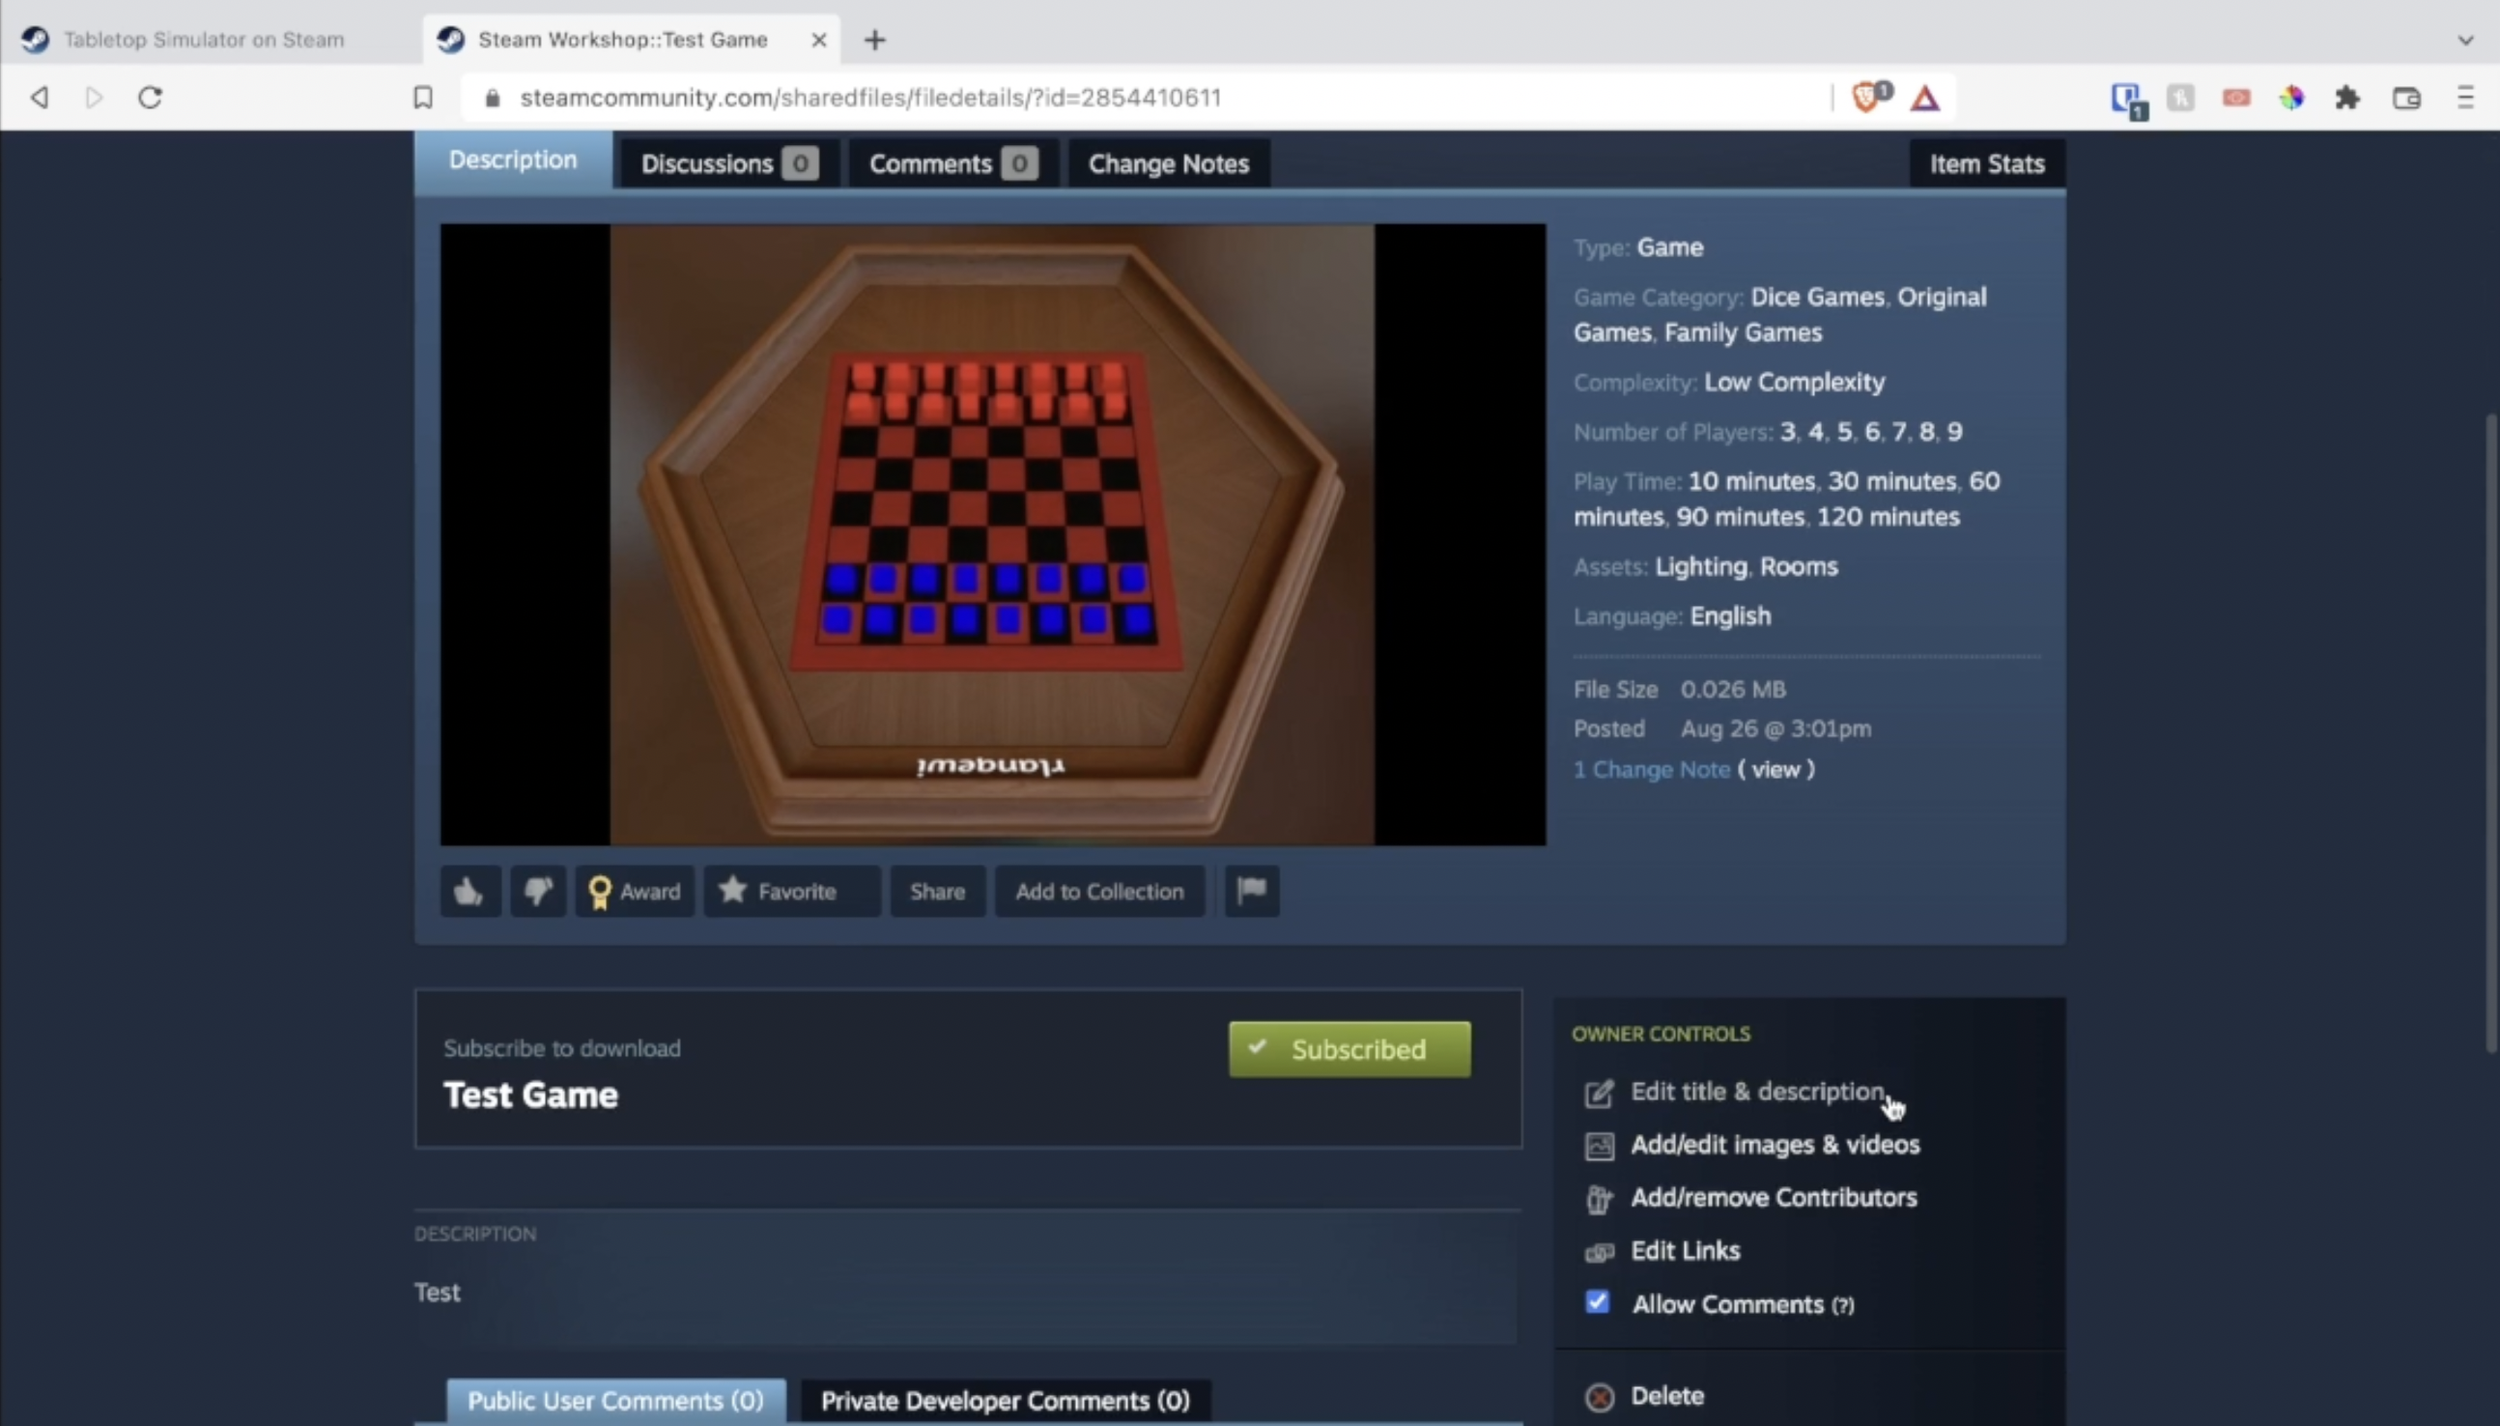
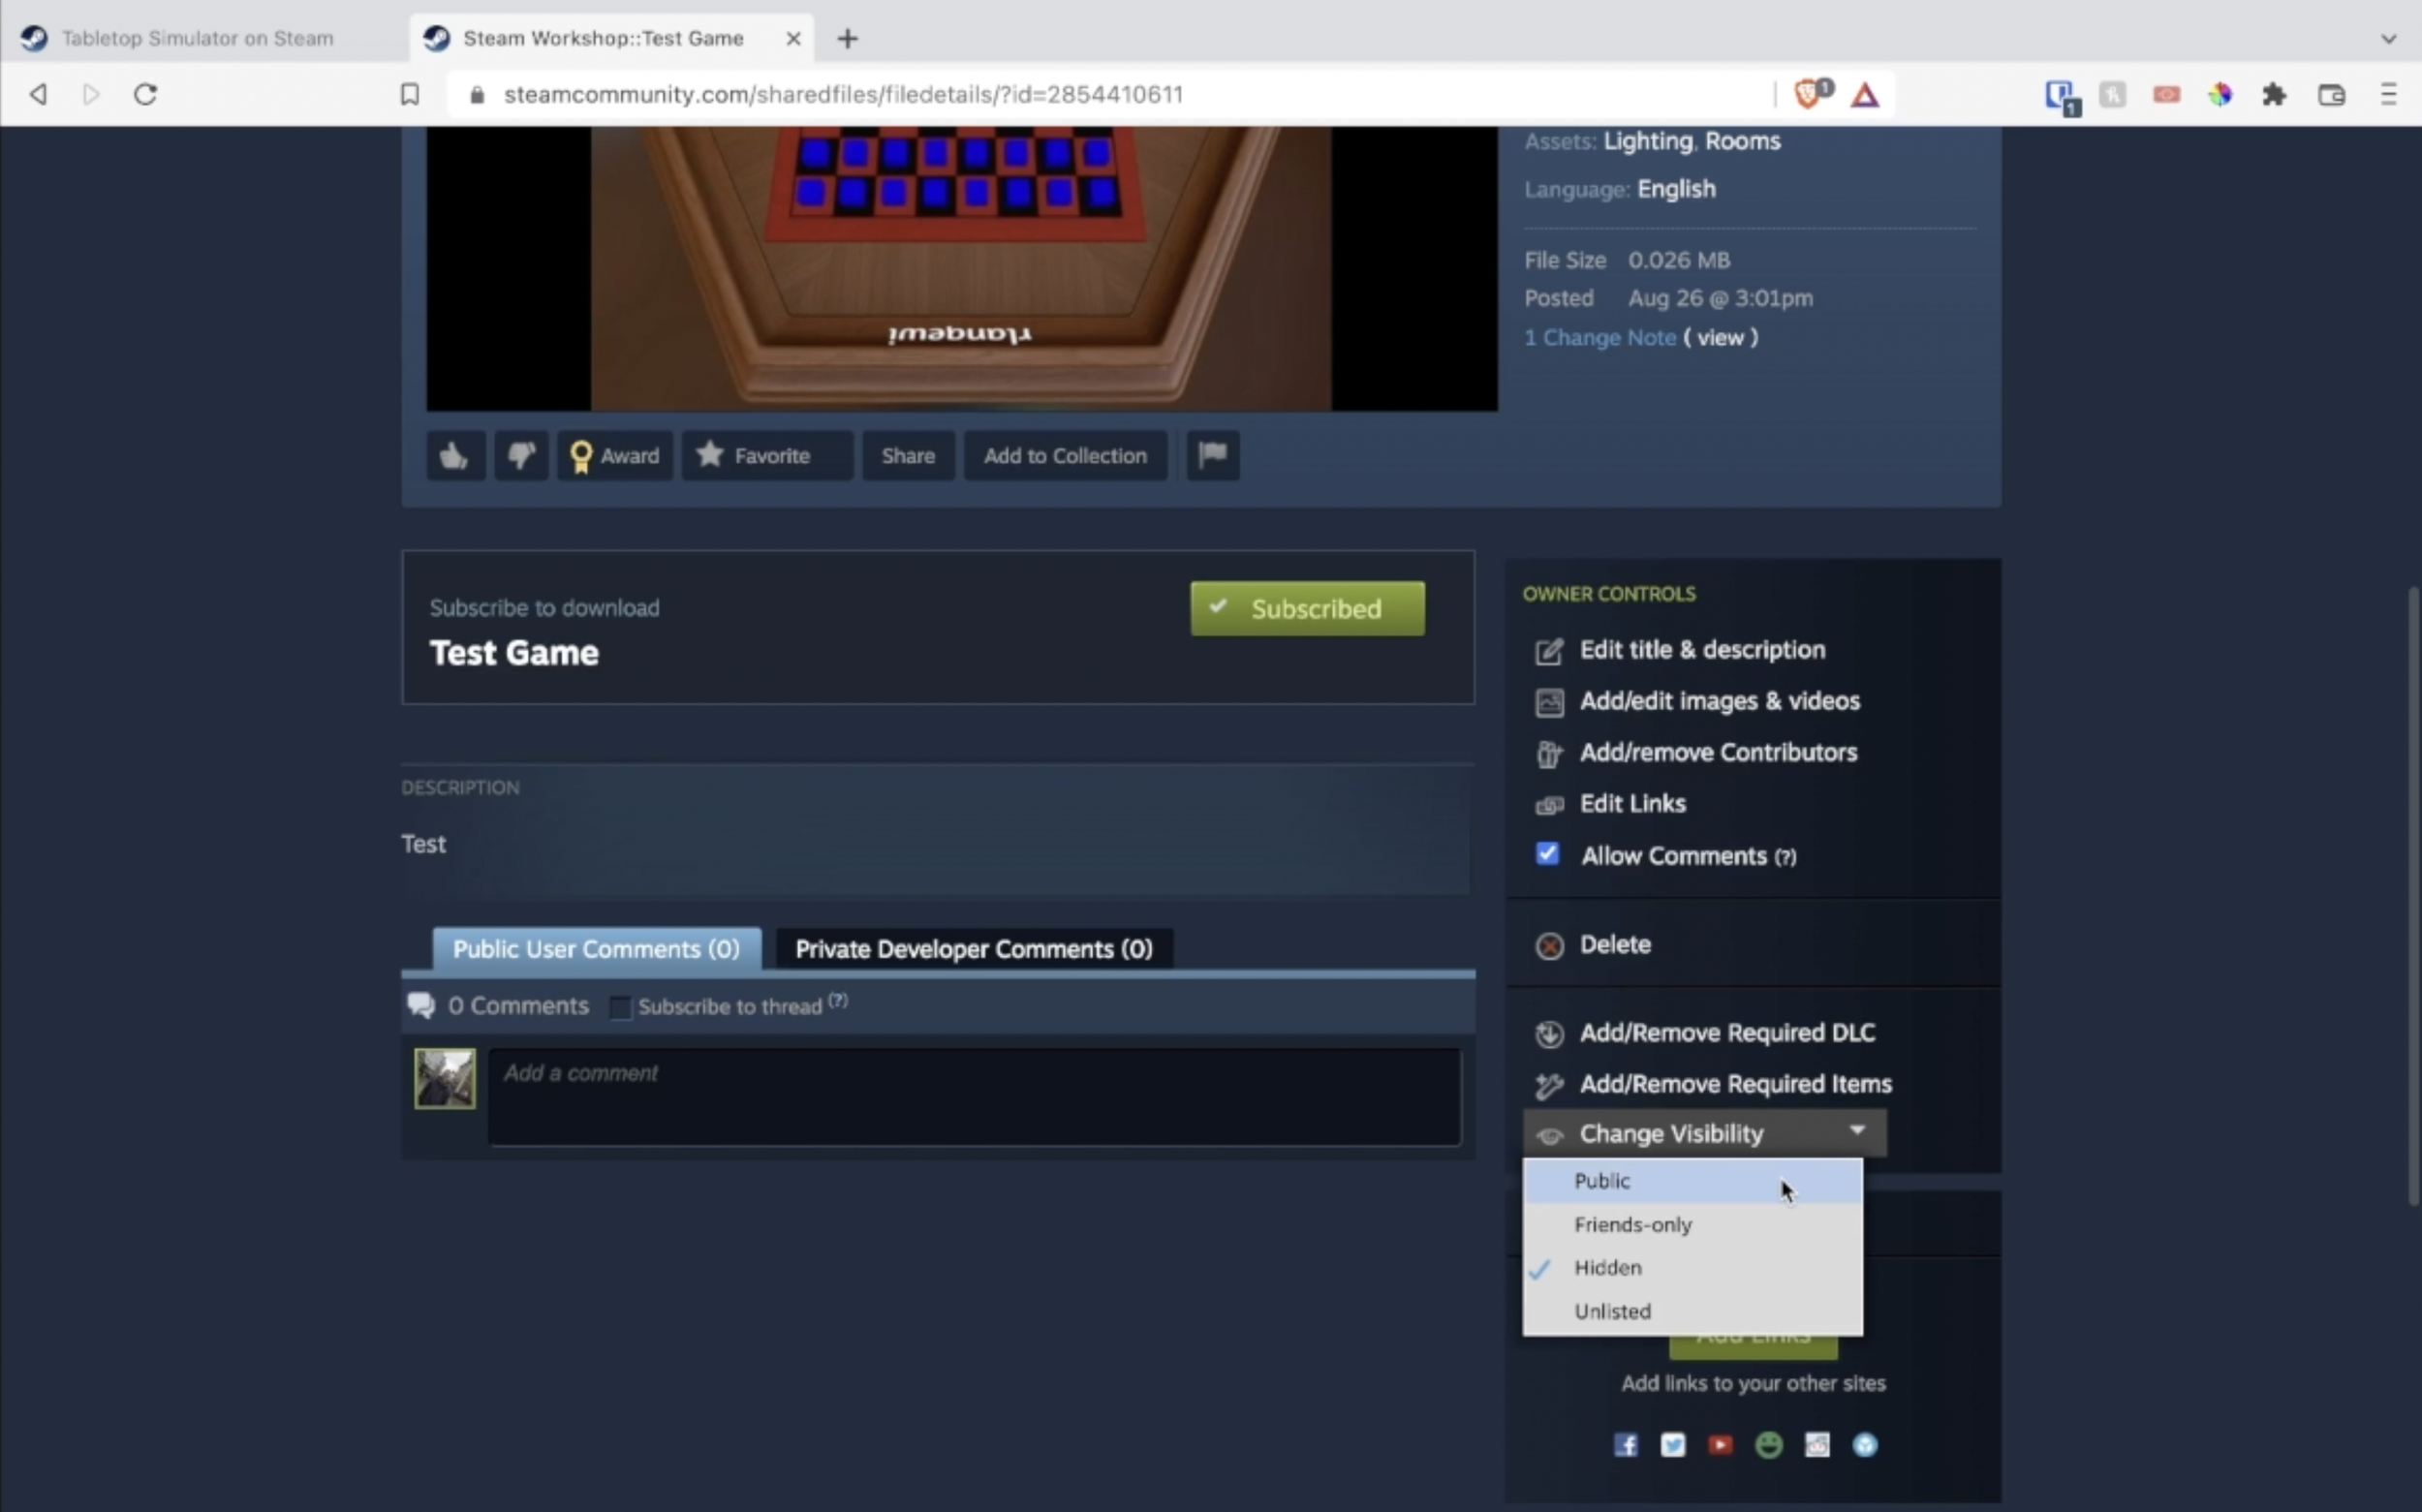
If you scroll down on the Workshop item page, you will see some options in the righthand “Owner Controls” menu to make changes to your mod. These include updating the title and description, modifying the associated images and videos, adding or removing contributors (if you have collaborators that should have access to the Workshop item), and updating the social links. There is also a “Delete” option that can be used to permanently delete your Workshop item.
Making Your Mod Publicly Available
Once you are satisfied with how the store page for your Workshop item is configured, you can push your mod live to the Steam Workshop by clicking the “Change Visibility” option and selecting “Public.” There are also options for making the mod visible only to your Steam friends or “Unlisted” which will give access to anyone with a direct link but will not appear in search results.
Congratulations, your Tabletop Simulator mod is now available in the Steam Workshop for other players to discover and subscribe to!
Updating an Existing Workshop Item
Eventually, you may want to make changes to a mod that you have already uploaded to the Steam Workshop. Suppose you’ve made changes in Tabletop Simulator and now want to push those changes to the Steam Workshop.
Begin by selecting the same Modding -> Workshop Upload option that we used for the initial Workshop upload. This time, we want to select the Update Workshop tab from the Workshop form.

Here, you will need to specify the Workshop ID that was displayed earlier when we first uploaded the mod. The easiest way to retrieve this ID is to navigate to the page for our mod in the Steam Workshop and copy it from the URL.
Returning to the Steam Workshop page in our browser, you can see the ID at the end of the URL. Simply select it, copy it, and then return to Tabletop Simulator.

You can then paste this ID into the “Workshop ID” field in the form for updating our mod. The form also provides options for updating the thumbnail or tags, if you would like.

You can now click the Update button and, after a few seconds, you should see a success message.
If you return to the Steam Workshop page, you should see that your updates have been applied.
And that’s all you need to know about uploading to the Steam Workshop in Tabletop Simulator!
About Ryan!
Ryan works by day as a Software Engineer but has had a lifelong interest in game and puzzle design. He creates videos for game designers on his Ludo Lodge YouTube channel, develops video games with his older brother as Bullet Squid, and dabbles in tabletop game design with Tasty Humans being his first published board game. You can check out Ryan’s portfolio on his personal website, or follow him on Twitter.
What questions do you want answered next in the Tabletop Simulator Tutorial Series? Comment below and let us know!