Creating Custom Cards On Tabletop Simulator
A step-by-step guide to making a deck of cards on Tabletop Simulator by guest writer Elli Amir (He/They)!

Tabletop Simulator is the perfect tool for rapidly developing your board game, including unique cards and decks. So, to help with that, this article will lay out an easy and fast workflow for importing cards into Tabletop Simulator. I will also suggest a few ideas for helping with your game design and development process based on my extensive work on Tabletop Simulator playtesting my upcoming card game, Worldbreakers: Advent of the Khanate.
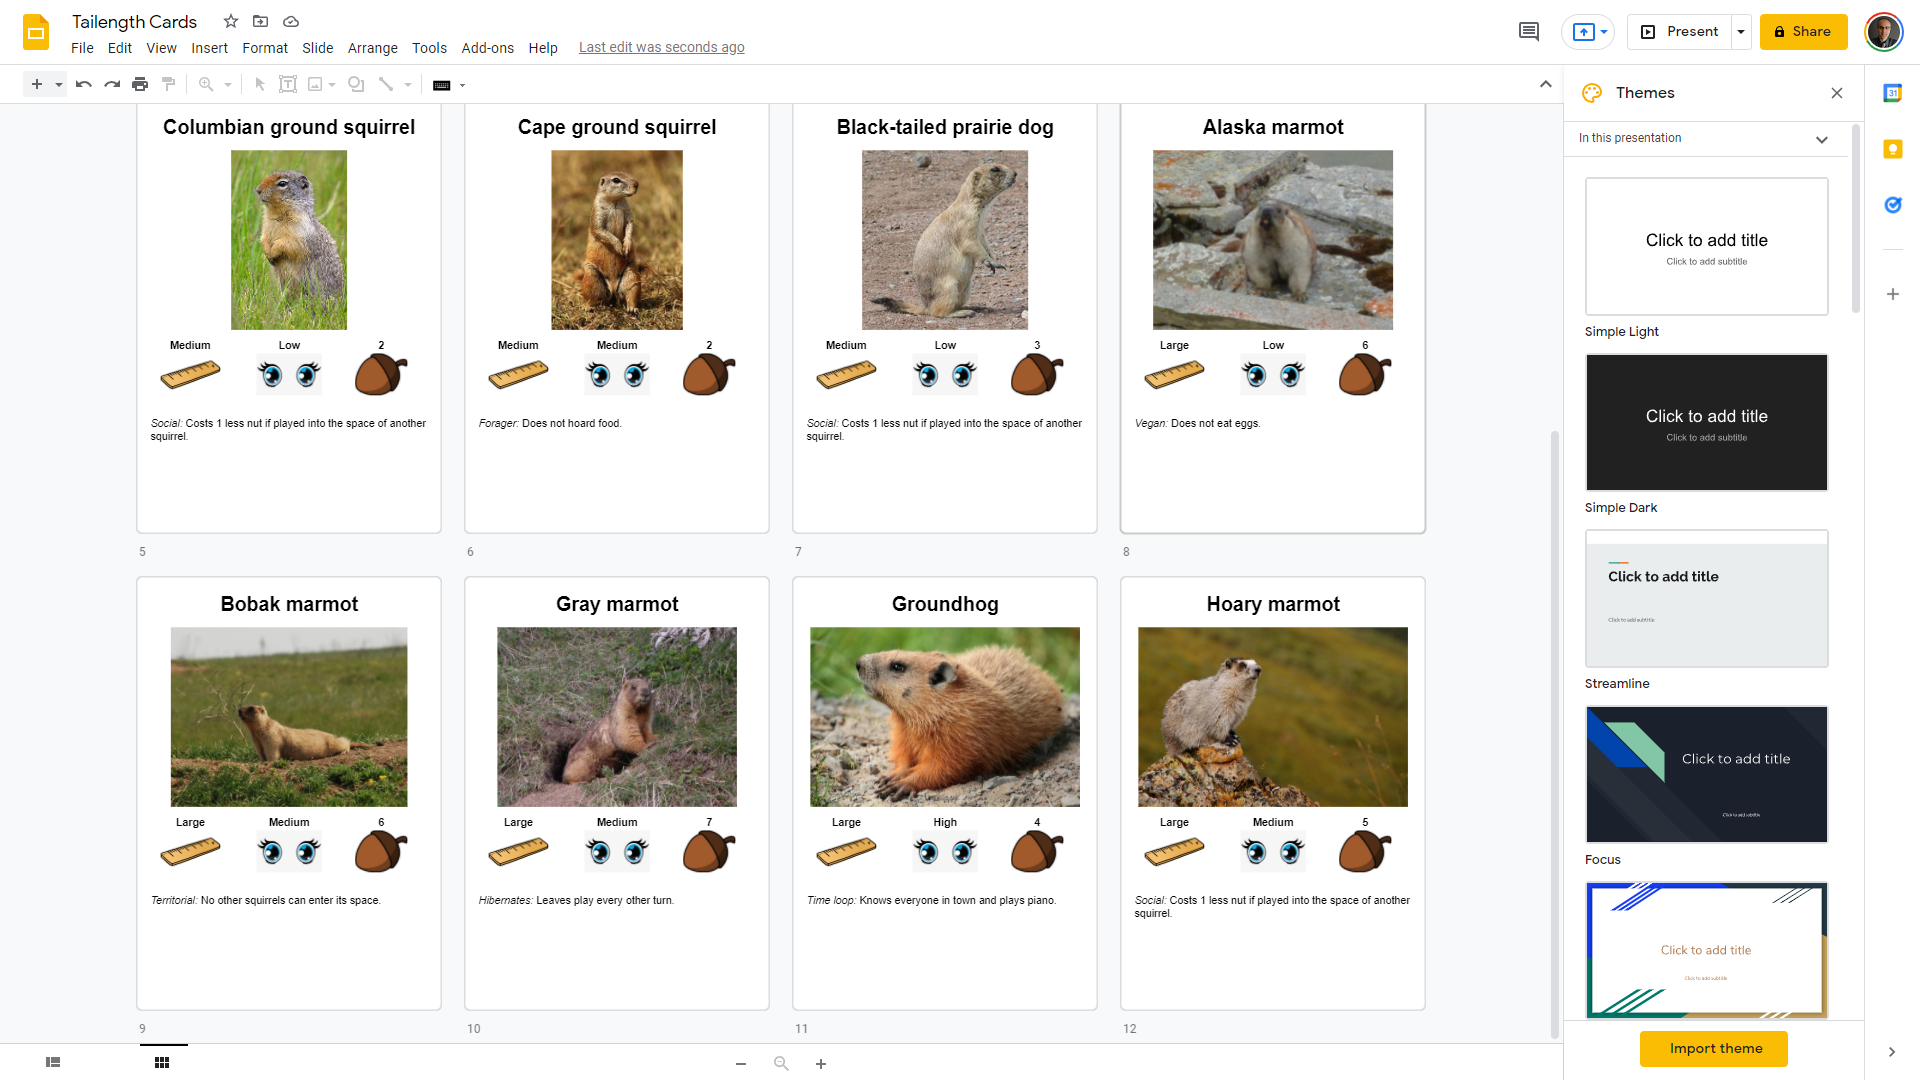
To get a feel for the process, let’s start with an example: You are developing a new board game called “Tailength”. Tailength is a competitive squirrel-collection, engine-building game for 1-5 players. You have a rough sketch of the rules and ideas for the game board and the different resources players will accumulate. You plan to represent each squirrel with a Squirrel Card that will list its gameplay attributes: size, cuteness level, a nut cost, and a special ability. Last but not least, each card will have an oil painting depicting the cute animal in its natural habitat. You are ready to start playtesting a few early card ideas in Tabletop Simulator.
Designing the card layout
The first step is designing the card layout, the physical position of the name, attributes, ability text, and art on the card. The best way to design the layout is to take one of the cards and use that as a model. For Tailength we will use the “Prevost’s squirrel” card, which has a size of “Small”, a cuteness level of “High”, a nut cost of 1, and the “Adaptable” ability.
To design our card, we are going to use Google Slides since it is free, familiar to a wide audience, and sits on the cloud (which means everything is backed up automatically!). Start a new Slides document and remove the default slide layout by going to the “Slide” menu and choosing “Apply Layout >” and then “Blank”. Next, we are going to change the slide size to 7 x 10 inches, which is the default proportion of card size in Tabletop Simulator. To do this, click on “File” menu and “Page setup”. Change the top dropdown to “Custom”, the metric dropdown to “Inches”, and the values to 7 and 10, respectively.

Now we have a clean slate and can start populating it with the card name and the different attributes. Always focus on function rather than style. You want to make sure that the card 1) includes all of the information needed to play the game and 2) presents it in an easily-accessible format. Here are a few pointers for your design:
Card names typically appear at the top of the card with a large bold font (at least 30 points).
For now, place any attributes either to the left or at the center of the card so that players have an easy time finding them.
Card text can have lower font sizes. I suggest staying at 18 points or more for readability.
Many games have keywords that communicate certain mechanics to the reader. You can represent these using italics, bold, capitalization.
Incorporating some minimal graphics will make playtesting more effective and fun. Include an icon for any card attributes and try to find a unique image for each card. Google is your friend: search for “TERM clipart free” and the top few results should have something appropriate.
* It’s important to remember that there are several elements that could become time sinks while not directly contributing to your game’s development. In particular, decisions around font face choices, card frame, and text and background colors can wait until your game is more mature. The Google Slides defaults (Arial and black for font, white for background color) look good in Tabletop Simulator and are an excellent starting point.
Here is our model Squirrel card, Prevost’s squirrel:

Creating the cards
We will use this model card as a layout for all of the different cards in the game. Right click on the model card slide then, in the slide navigator to the left, choose “Duplicate slide”. This will create a copy of the model card. Update the title, attributes, ability, and image as needed to create the next Squirrel:

Repeat this process for the remaining cards in your game.
* Another note to remember: Playing a game for the first few times is a very educational experience. Your ideas will evolve and diverge rapidly as you get a better feel on what makes your game fun and which pitfalls to avoid. So, even if you envision having hundreds of unique cards down the line, you probably only need a handful of cards for now. Create enough cards to play a couple of turns and then organically add more as development progresses.
Generating the card image collage
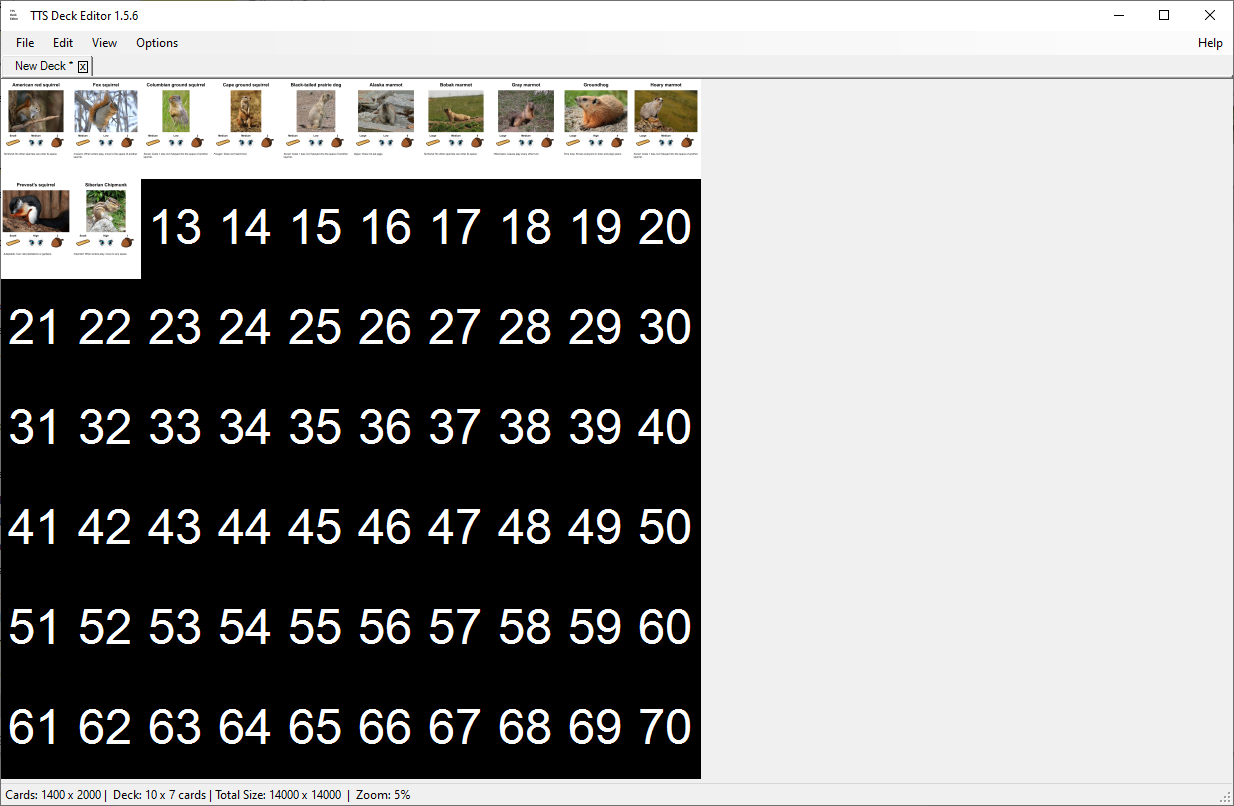
Tabletop Simulator uses a collage format in order to import cards. In a collage, the card images are placed next to each other in a grid shape, forming one big image. The Tabletop Simulator default has ten cards in each grid row and seven cards in each grid column. This is how our twelve Squirrel cards look like as a collage:

Next, we will go through three steps to convert the Google Slides document to the collage:
Step 1: Download the slides as PDFs. In Google Slides, under the “Files” menu, click on “Downloads >” and then “PDF Document (.pdf)”.
Step 2: Convert the PDFs into PNGs. There are several tools that break down a PDF into separate PNG images, with one image for each page. I recommend (pdf2png.com)[pdf2png.com]. Once your PNGs are compiled, you can download the result as a ZIP file. Once download is complete, unzip the file.
Step 3: Combine the PNGs into a single collage PNG. Tabletop Simulator has a Deck Builder app that combines the single images into the collage. To find it, go to Steam. Then, under the “Library” tab, you will see a list of your games to the left. Right-click on “Tabletop Simulator”, choose “Manage >” and “Browse local files”. This will open a file browser where you can enter the “Modding” directory, then “Deck Builder”, and finally run TTS-Deck-Editor. Within the deck builder, click on “New Deck”. Drag-and-drop your single-image PNGs into the resulting dialog, and you should see all of your cards in montage form:
Finally, click on “File” and then “Export”. The “Export” dialog will open. Check off “Max Deck Size” and make sure the number is set to 4096. Then click on “Export” and choose where to save the file.
Your collage is ready! Let’s go into Tabletop Simulator and bring your cards to life!
Importing the deck into Tabletop Simulator
Let’s start with an empty board and create our custom deck there. First, launch Tabletop Simulator and in the starting menu choose “Create” and “Singleplayer”. In the following “Games” dialog, click on the red “X” in the top right, and you will see an empty table.
Now, click on “Objects” at the top, then “Components”, “Custom”, and “Deck”. Your cursor will become a pawn hovering over a white rectangle which represents your future deck. Click at the middle of the table to drop it and then right-click to open the “Custom Deck” dialog. We are going to update several of the options here.
First and foremost, the “Face” field is where you enter your collage image. Click on the yellow folder icon to the right of it to open a file browser. Find your collage PNG and choose it. Tabletop Simulator will ask you whether you want to upload the file to the Steam Cloud. If you only plan to play your game locally, choose “Local”. However, note that you should not move the collage file or Tabletop Simulator will not be able to find it in the future. Alternatively, if you plan to play your game online with other people, choose “Cloud” and then “Upload”.
Next, you should choose a back for your cards. Similar to before, you can create a blank slide in Google Slides, download it as a PNG (“File”, “Download >”, and “PNG image (.png, current slide)”) and use that. Choose either “Local” or “Cloud”, and then “Upload” as before.
The “Width” and “Height” indicate the number of rows and columns in the collage file. Since we used the deck builder defaults, you can leave these at 10 and 7. Next is the “Number” field which is the number of cards in the file. In the case of Tailength, that number is 12.
Finally, check off the “Back is Hidden” box. This will tell Tabletop Simulator that when players hold cards in their hands, opponents will see your card back image as the card backs.
Congratulations! Your cards are in Tabletop Simulator. To make sure all of the cards are there, you can right click the deck and choose “Search”. This will open a browser with all of the files to the right. Alternatively, you can right click the deck and choose “Flip” and then “Spread”. All of your cards will be laid out in front of you.
Happy playtesting!

…
Thank you for reading. If you reached this far I am guessing that you love card games. I am developing Worldbreakers: Advent of the Khanate, a customizable two-player card game set in alternative 13th century history. Worldbreakers is fast-paced, alternating between the players one action at a time. Players acquire resources, recruit Followers, and advance special Location cards for Power. If you would like to learn more, please join the Worldbreakers mailing list at this link!

Meet Elli Amir!
Elli is the designer of Worldbreakers: Advent of the Khanate, an upcoming customizable two-player card game set in alternative 13th-century history. They have been a playtester for Android: Netrunner, Star Wars: Destiny, and numerous other board and card games.